Category: Battle Report
Somewhere over the Channel
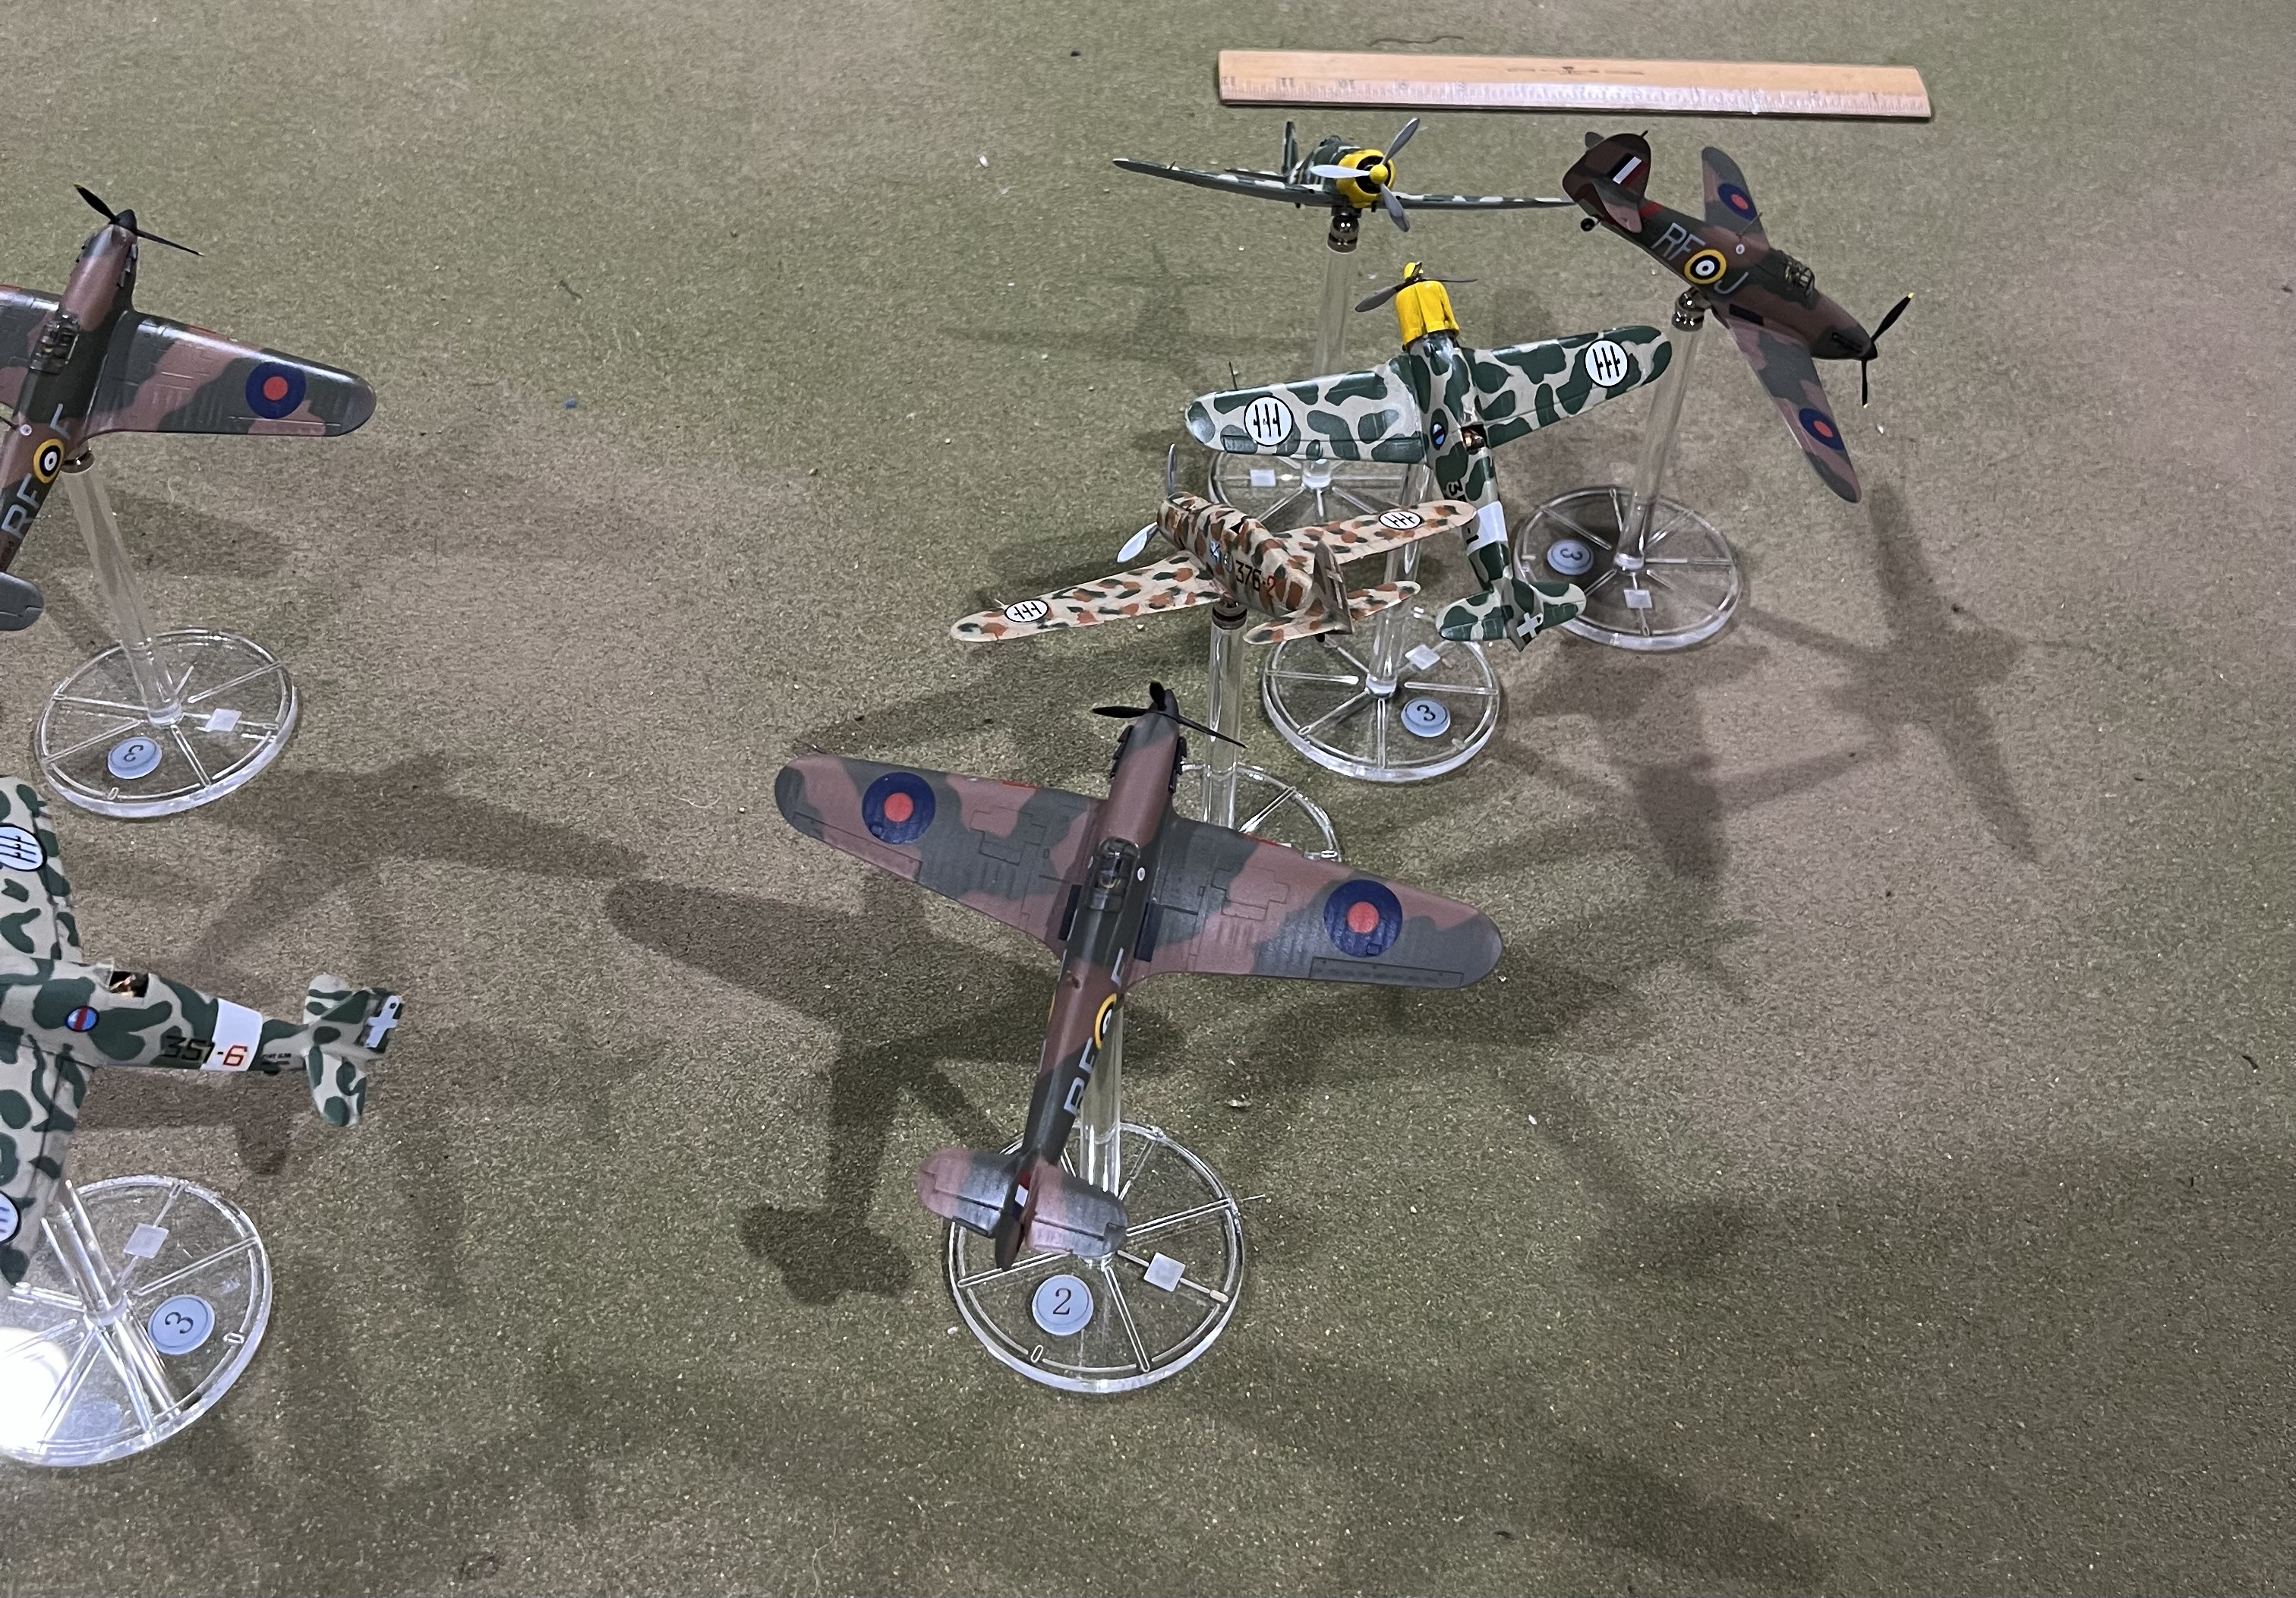
Some years ago, a regular opponent of mine, whom we shall call P, for internets privacy reasons, played Blood Red Skies a few times. We both found it a very satisfactory air combat game. However, we were not thrilled with the models. P is a modeler of some skill, and I was willing to have a go. So we decided to try it with 1/72 aircraft.
And then life and covid intervened. P made good progress on models, and flight stands, indeed, but I was much slower. I finally de digitated and made (very poorly) some Italian aircraft, as P had addressed the RAF/Luftwaffe.
This was the recent result.
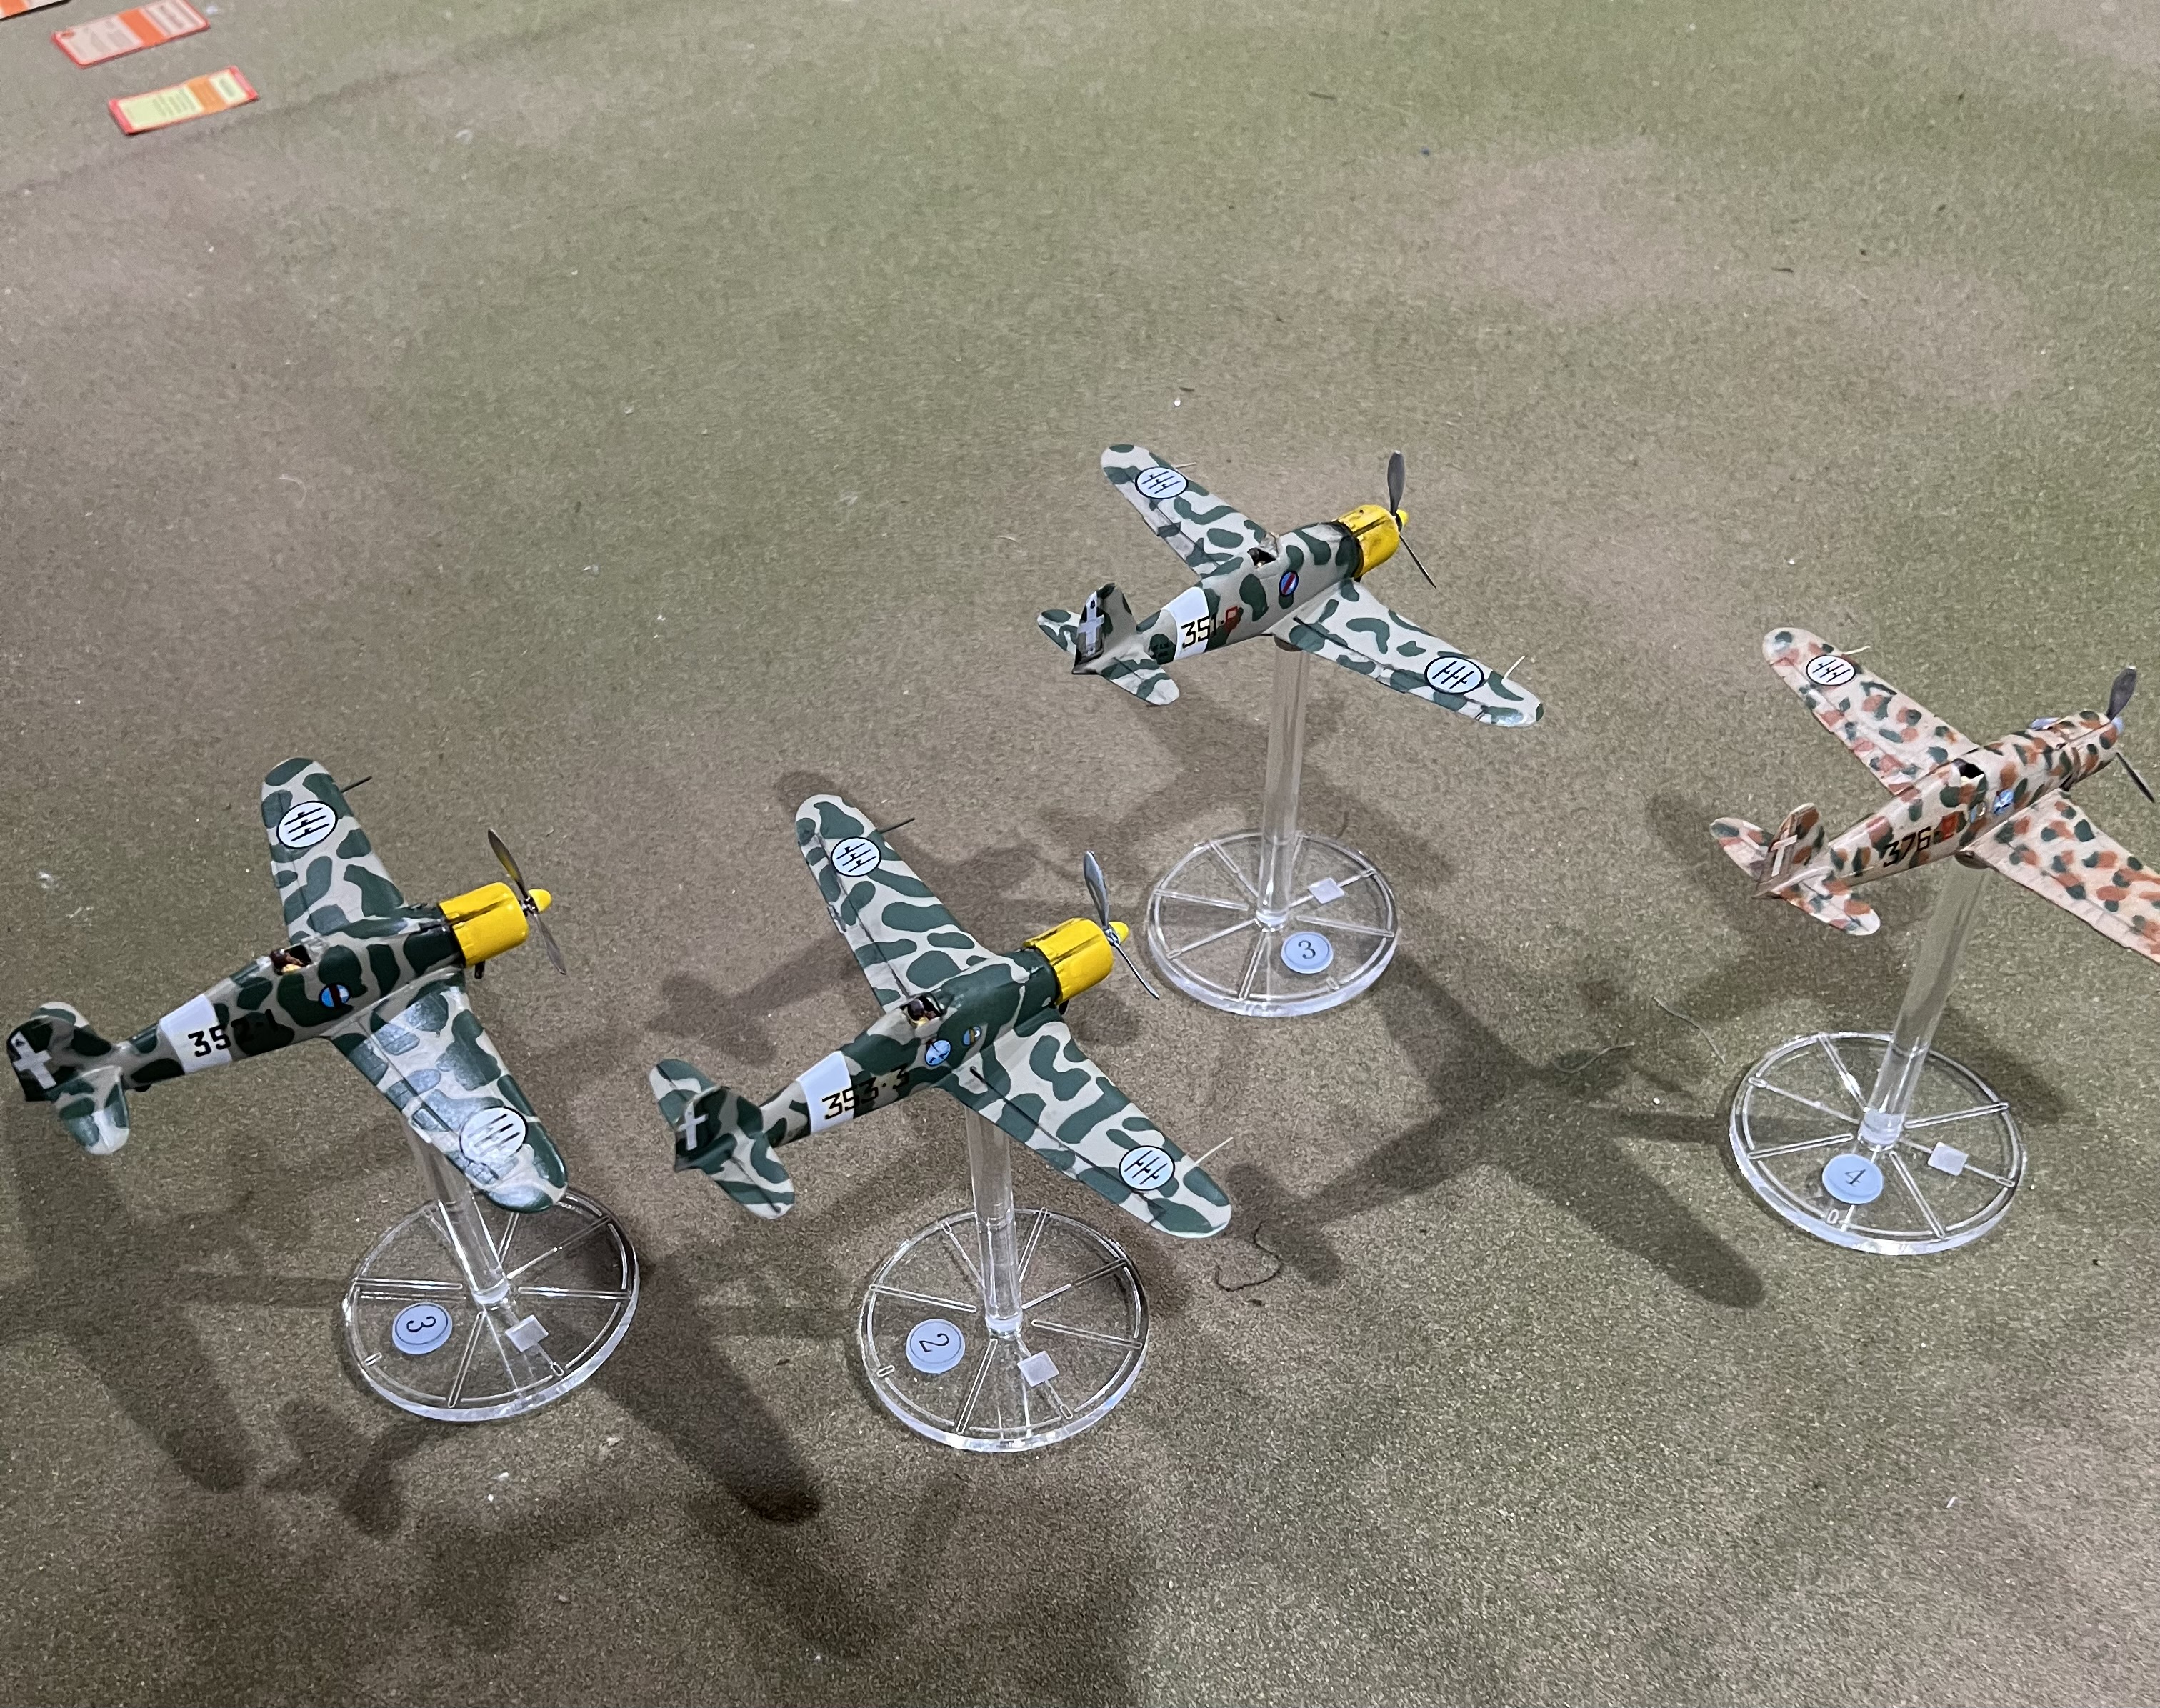

OK, first thing to note.. The RAF is wildly outpointed. But this was at Ps place, and he set it up. I did point out that he was going to have issues, but we just wanted to have a go, and get re-acquainted with the rules, so we went ahead.
I tried to separate to come in from 2 directions. The ‘Poor Quality’ card resulted in us not starting that well, and some other card gave us a boom chit.
My more skilled guys tried to go head on, while the other lads tried to creep around behind.

Nothing much happening. No successful shooting, but I’m getting forced ‘down’. It was at this stage we realised we were doing the move order wrong; we were doing it by advantage state within pilot skill; we would have been doing it as Pilot skill within advantage state. Oh well.
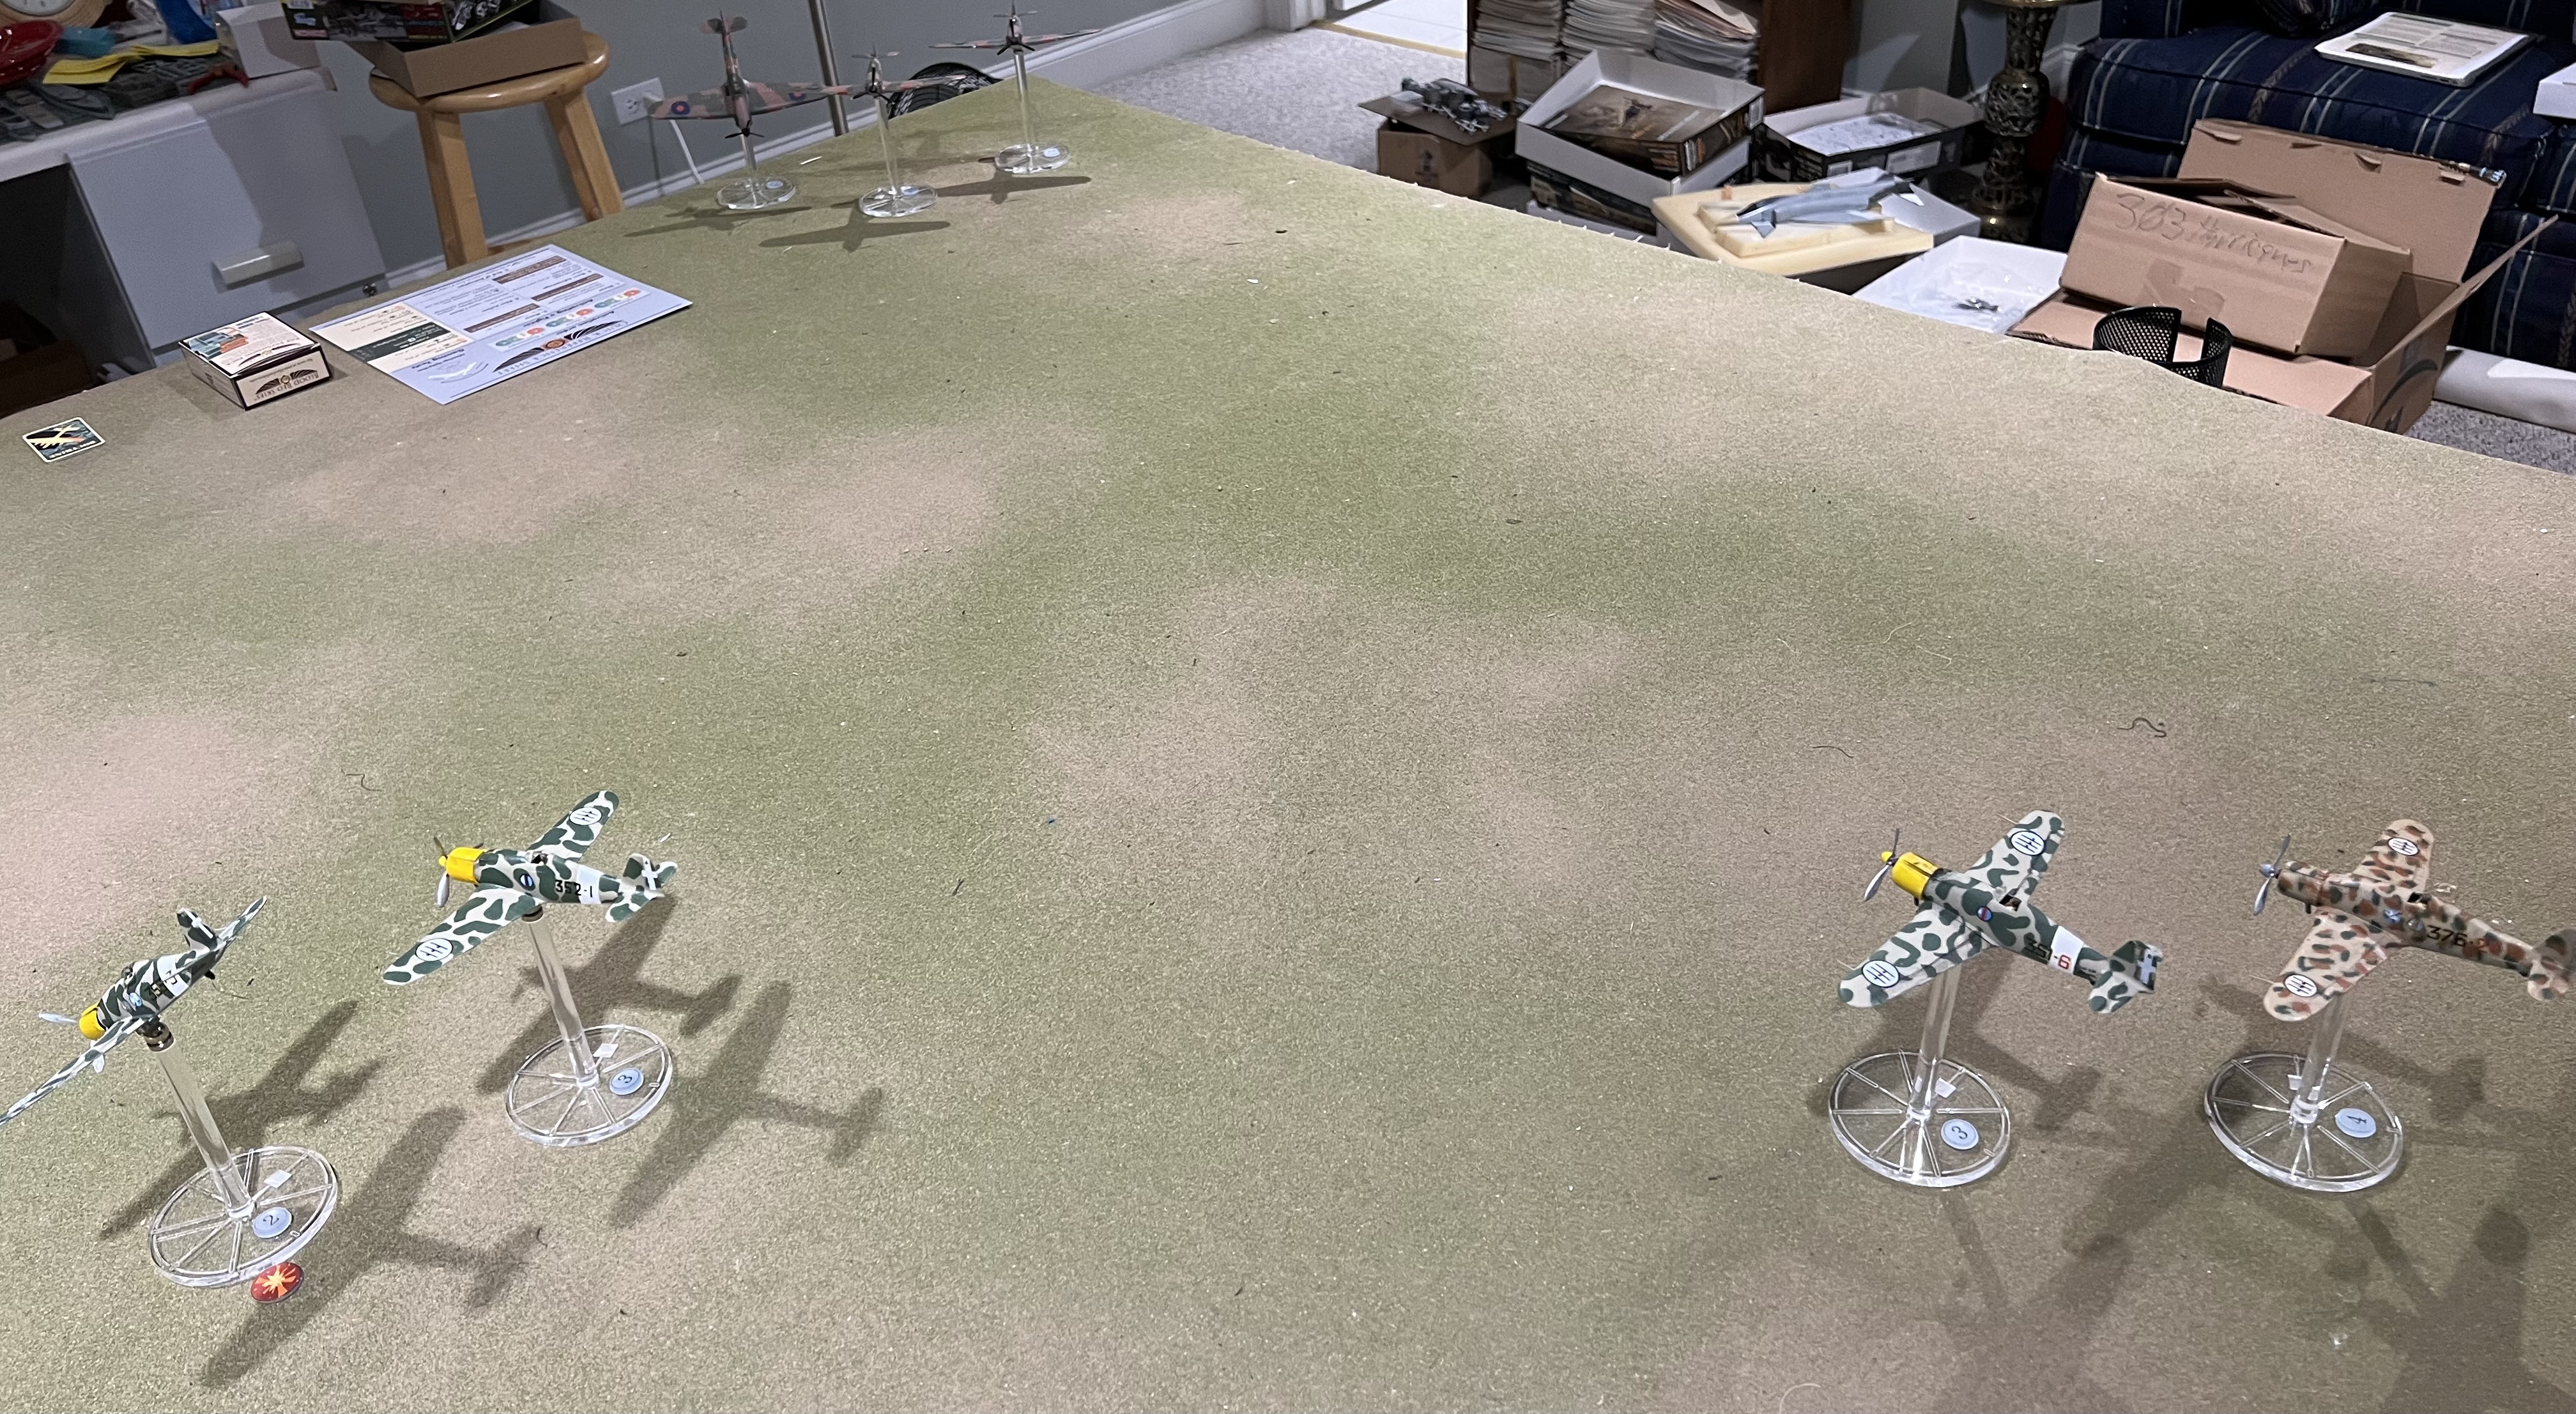
My second element is coming in, but the first is in the furball, and not in great position.
My lead plane is tailed. However P’s shooting dice deserted him, and the Capitano survives. That hurricane on the right is having problems also.
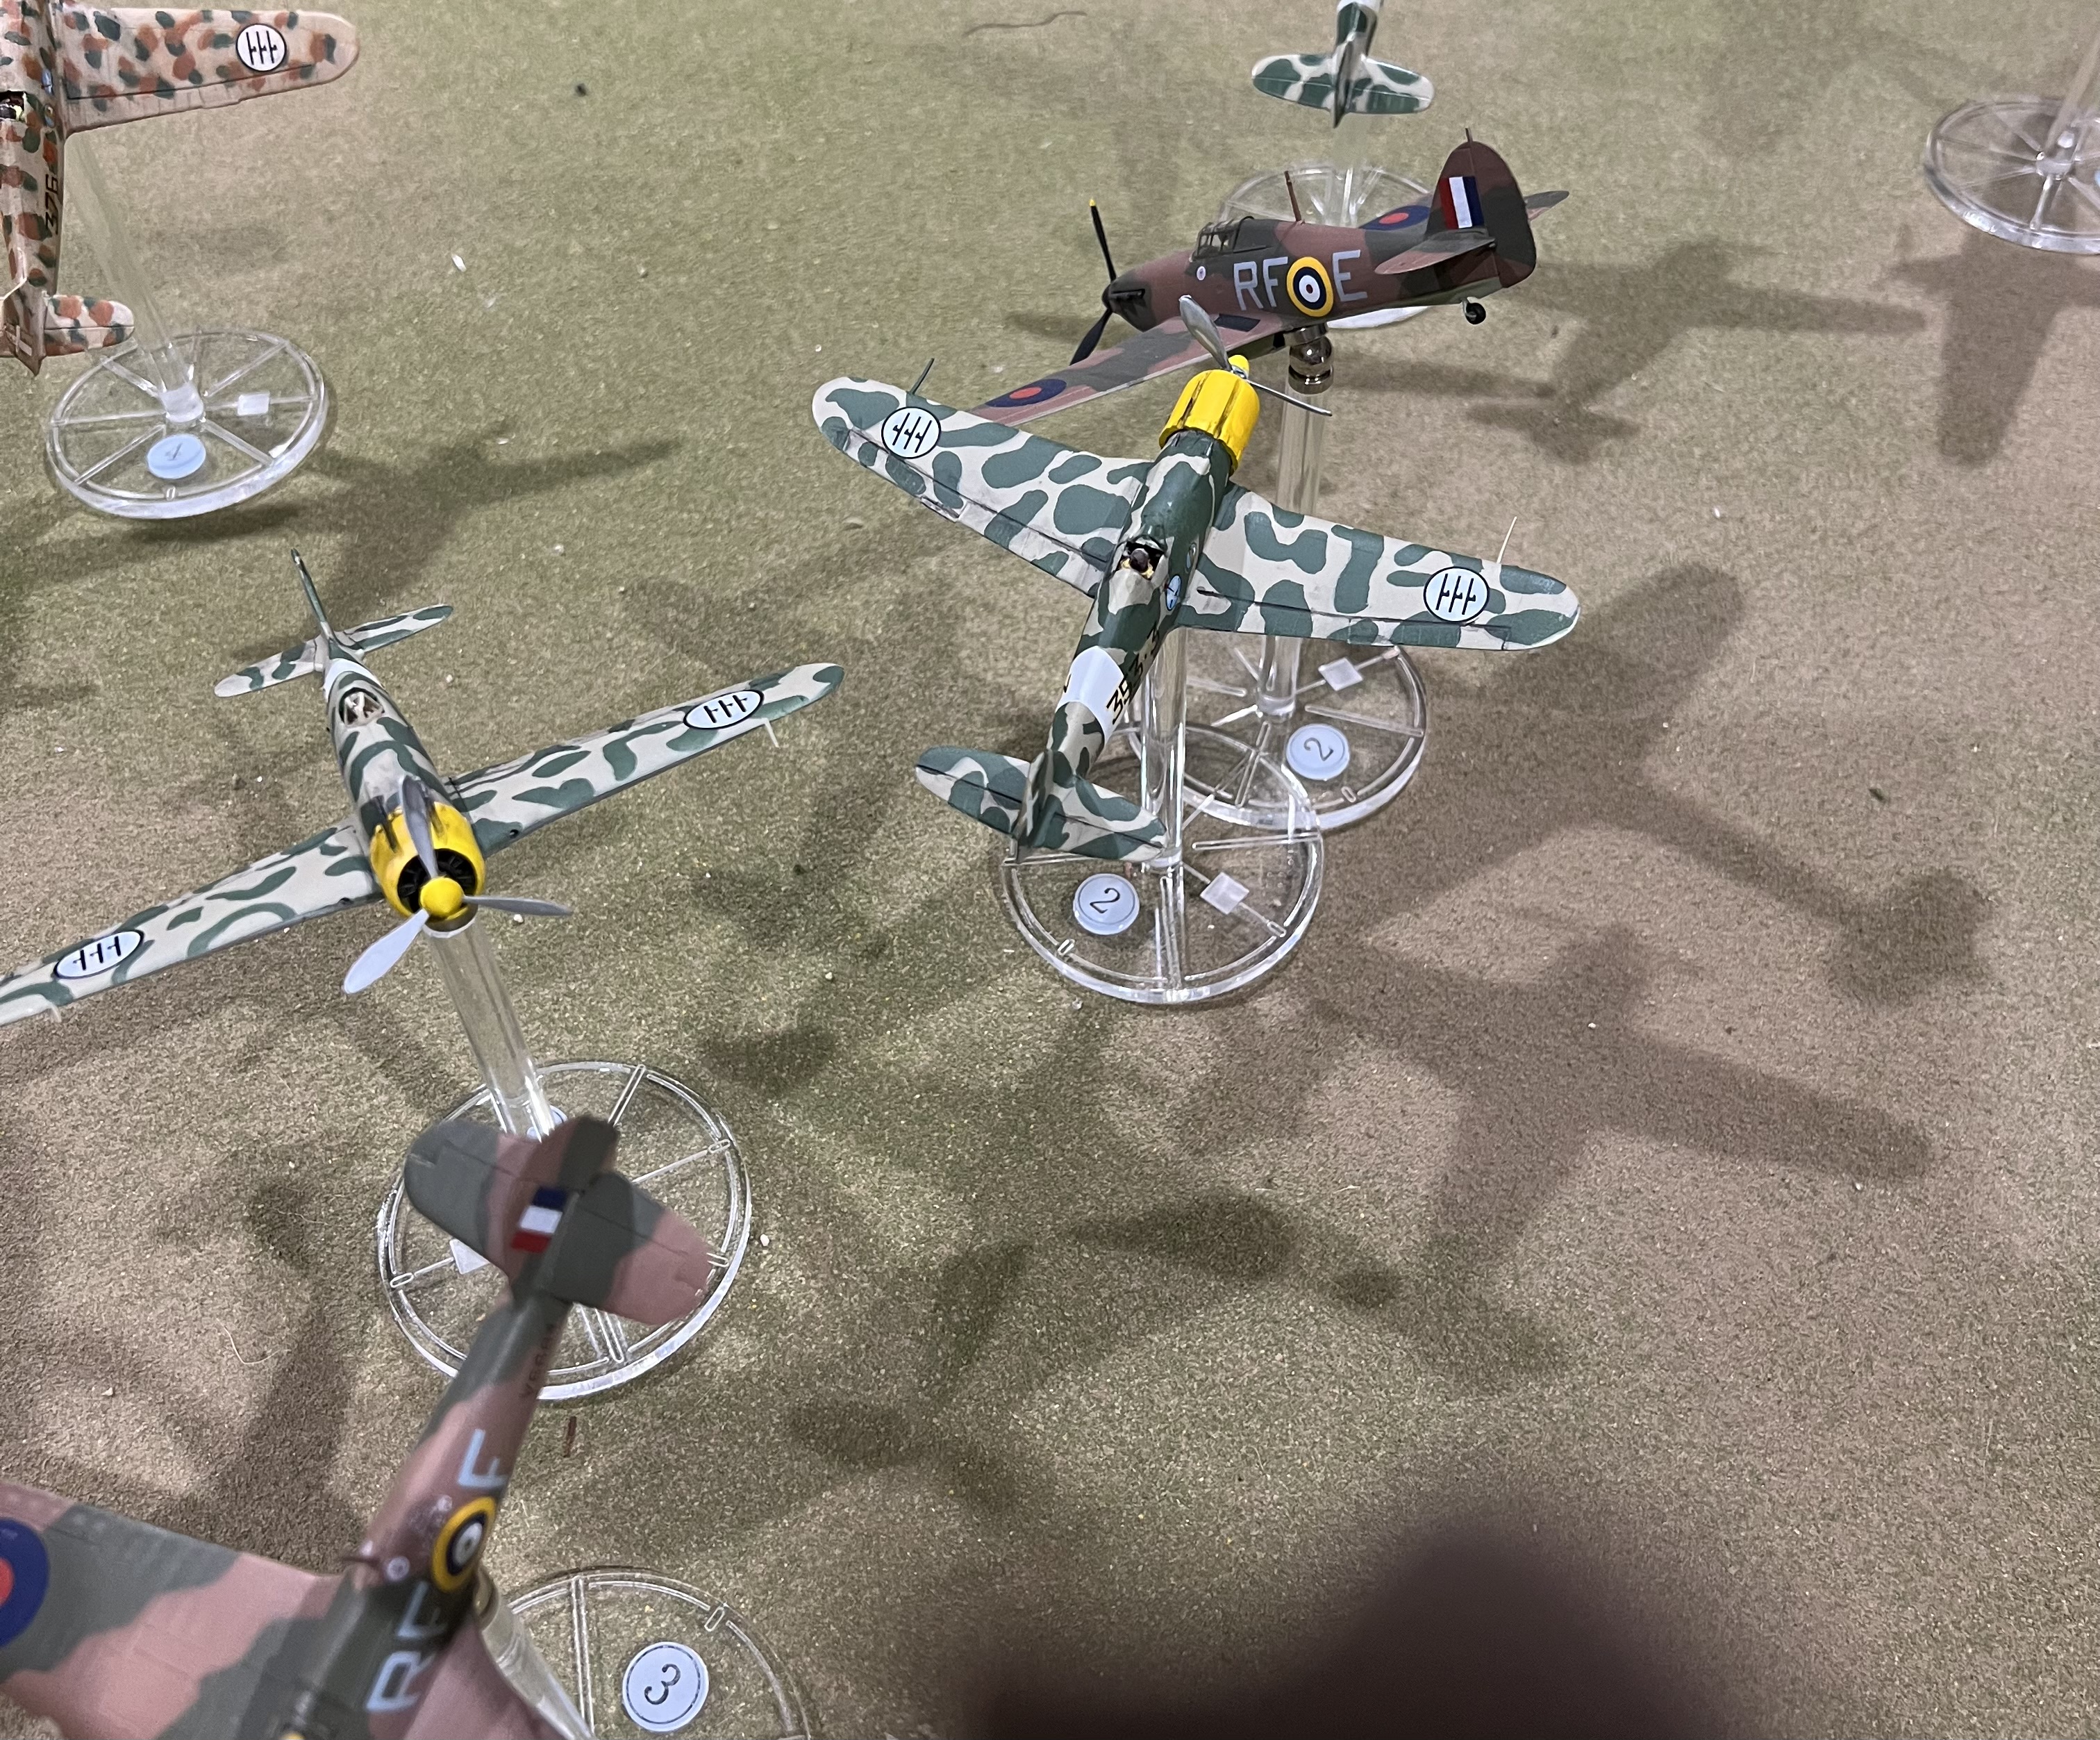
The unfortunate lad in the hurricane goes for a swim in the channel, and the other 2 RAF aircraft depart.
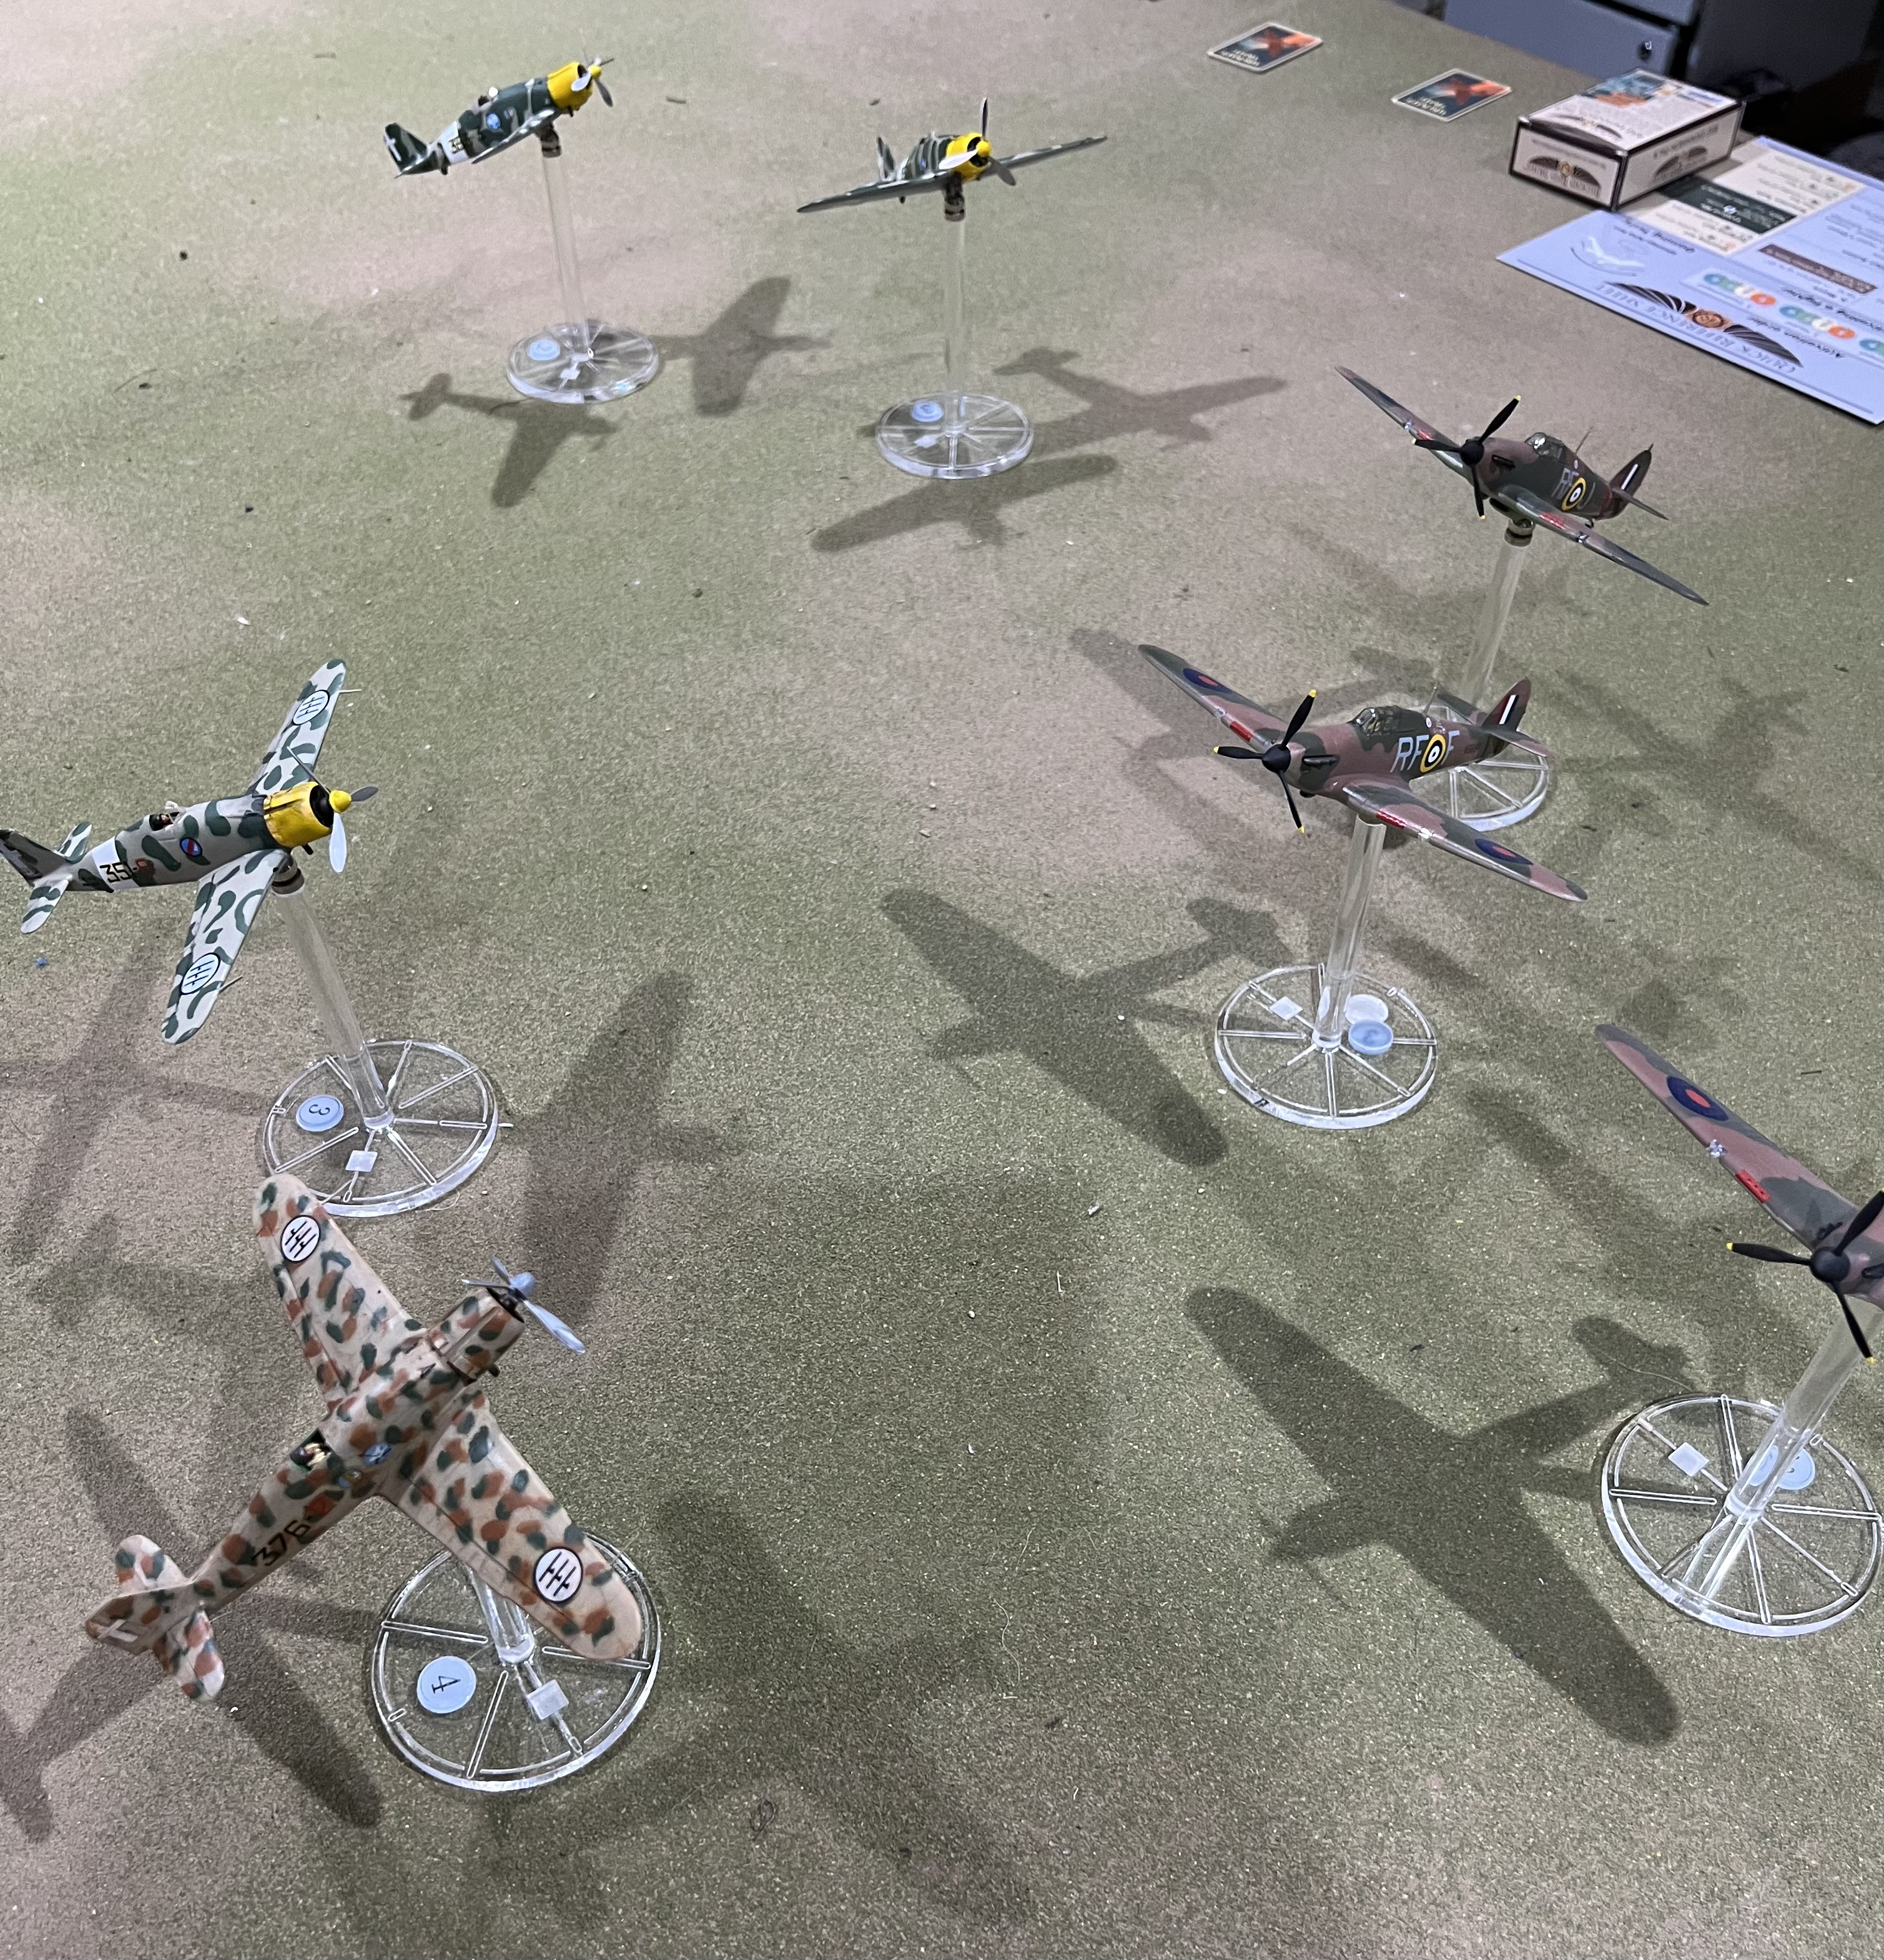
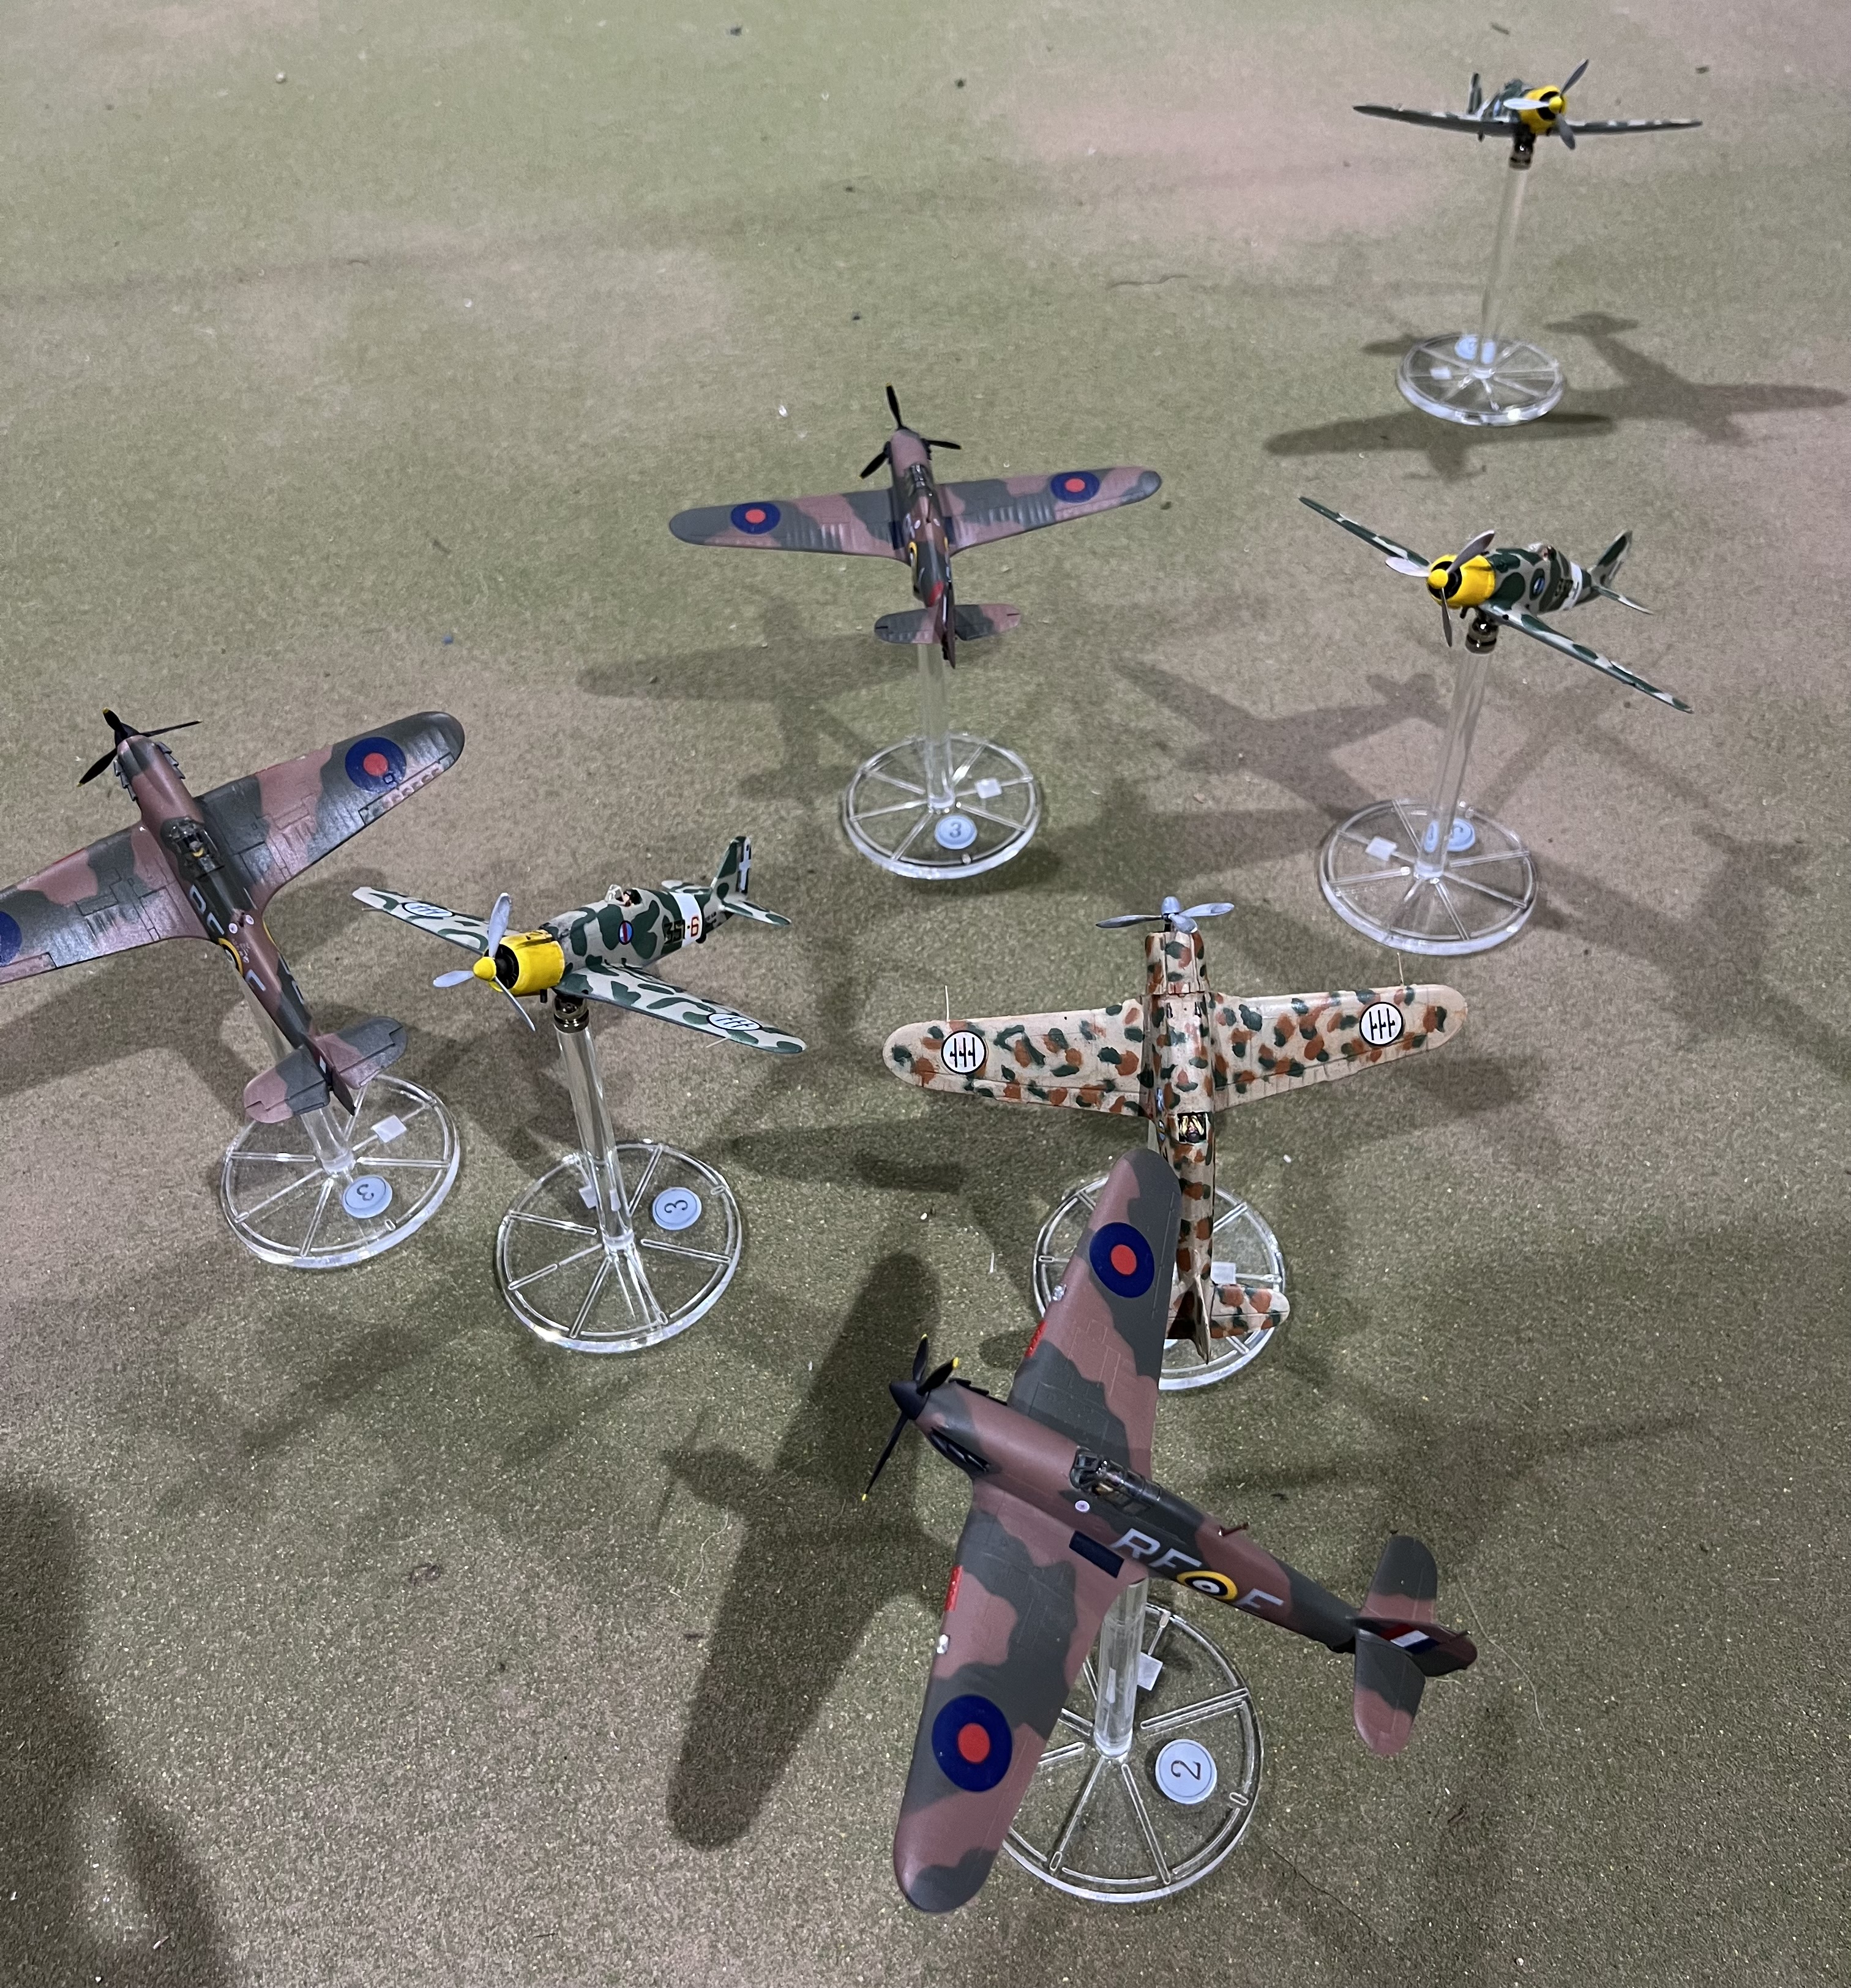
We thought to try a bomber scenario; unfortunately we didn’t read the scenario deployment rules thoroughly and….

My guys turned up in high cover behind the bomber, and the escorts were out of position to prevent tailing, and shortly after, destruction. The lesson, boys and girls, is RTFM. Ask an old person to explain the abbreviation.
Lessons learned. Hum. We need to pay more attention to the designed table size, we were playing on too large an area. Having said that, we both thought that, due to playing in 1/72, we need to increase measurements by about 50%. We speculated that a 40mm ‘measurement unit’ would serve. Also, we both thought we would reduce aircraft numbers by 1/3; 6 going to 4, for instance. This would imply a reduction in hits on ground targets when we get that far.
All that having been said (written?) we had a good time, and are invigorated in the exercise.
Ramming Speed!
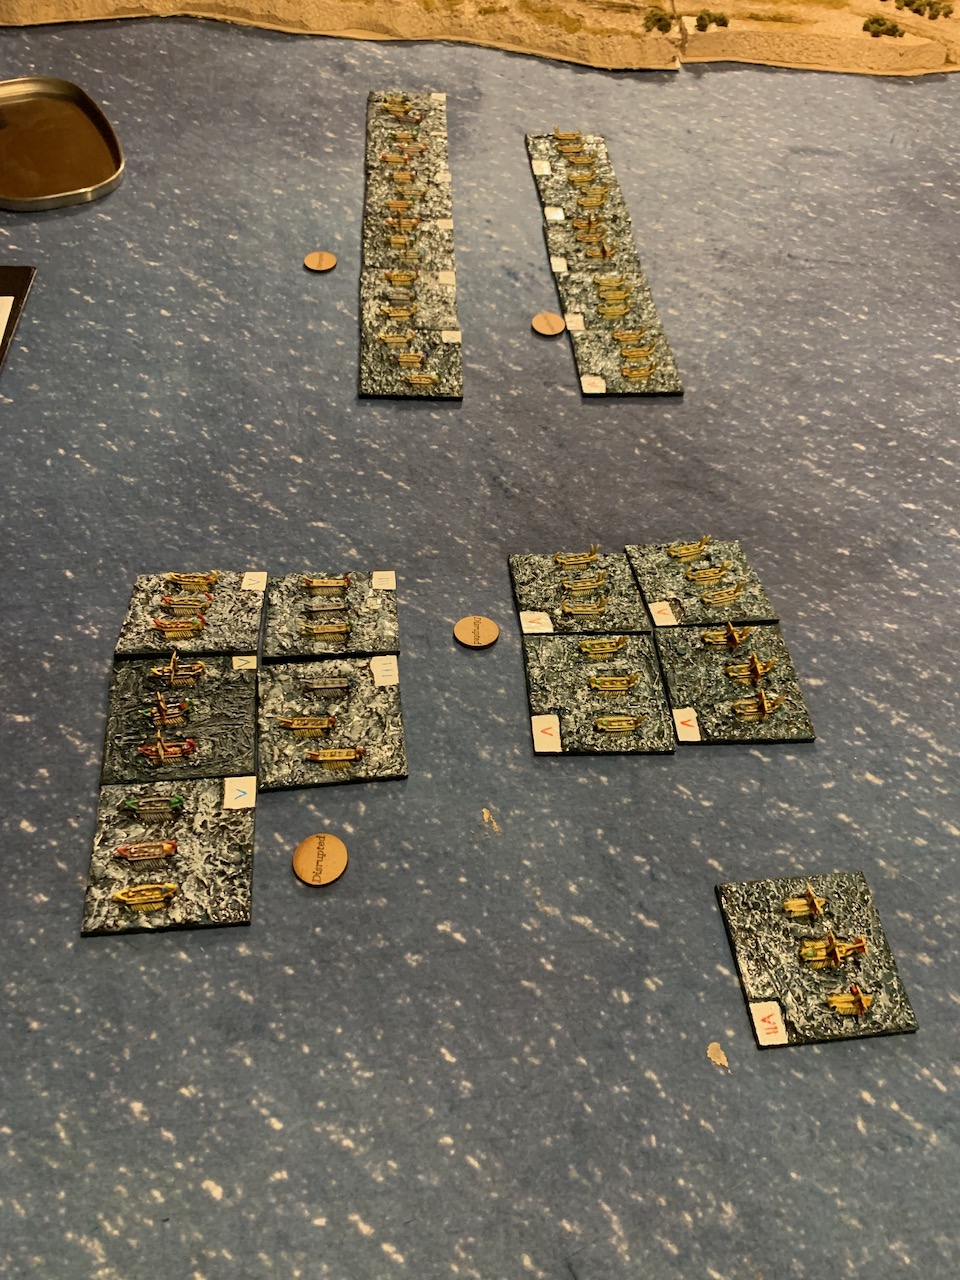
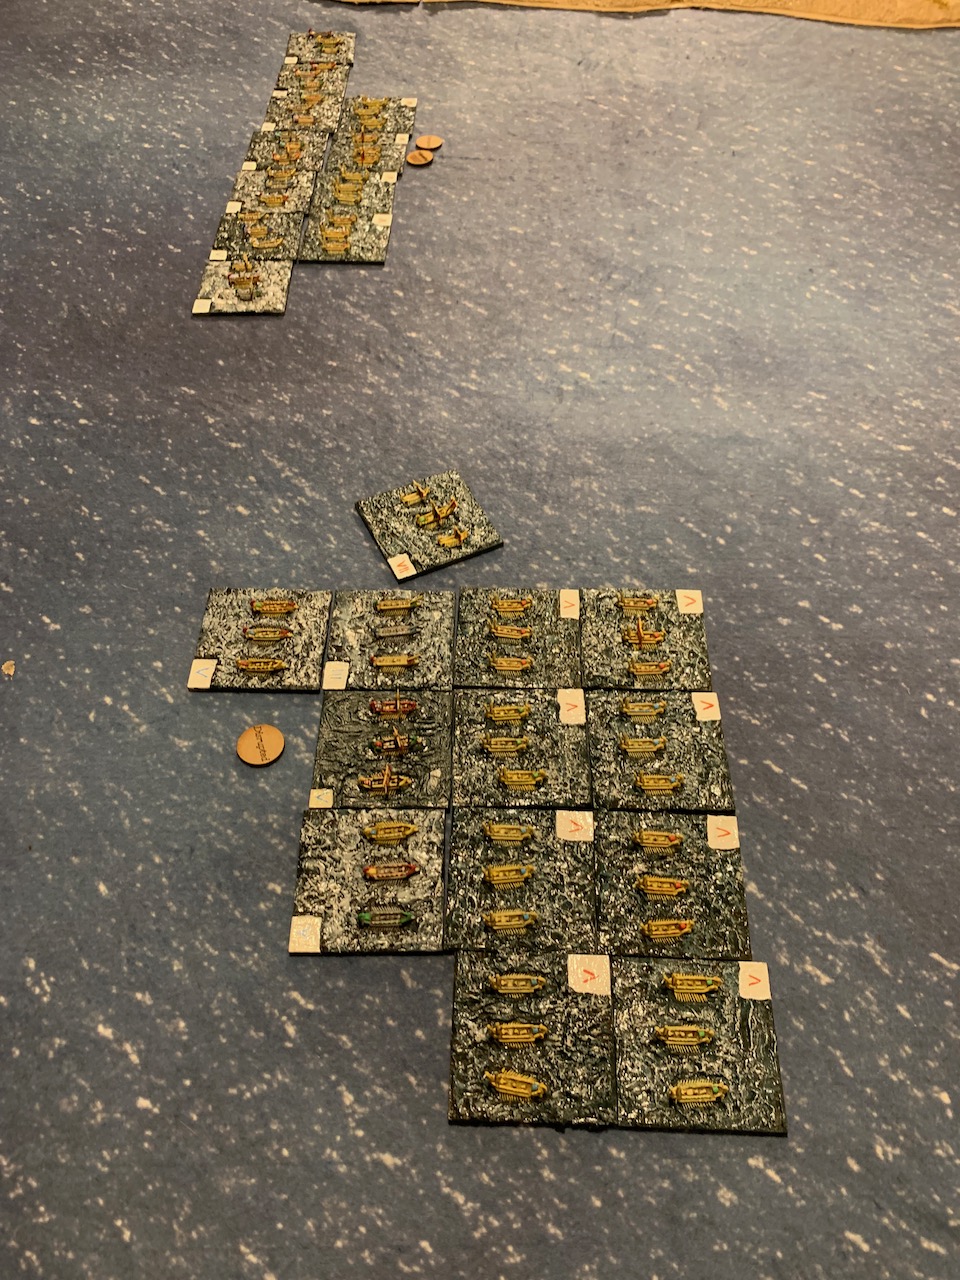
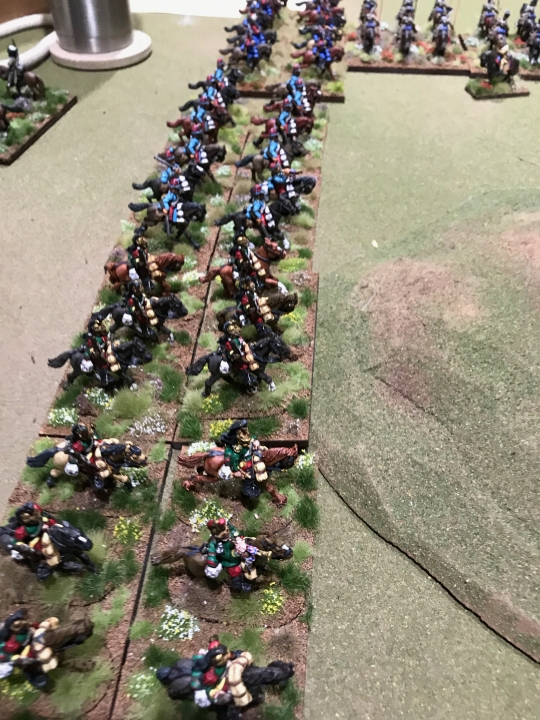
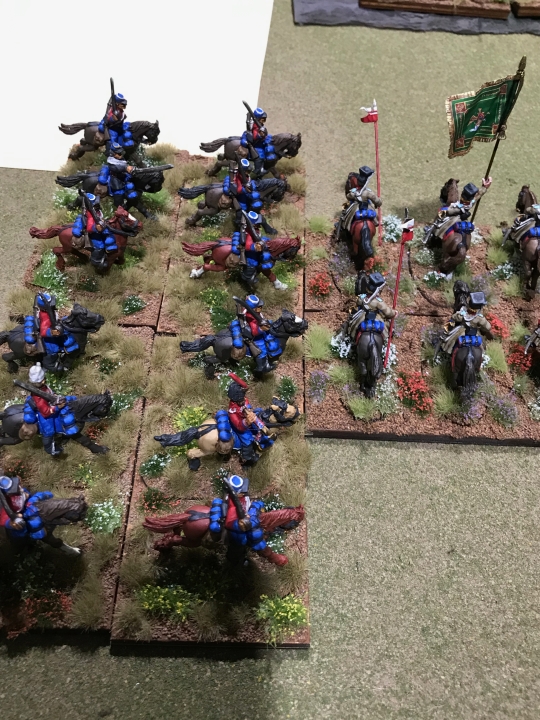
We got together to play a first game using the He Hemetera Thalassa, and the newly painted galley models.
Two sides were amateurishly put together using the points from the rules, and we ended with this :
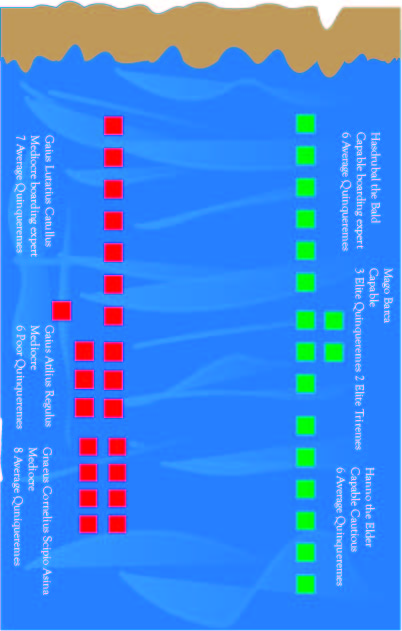
| Squadron | Leader Quality | Personality | Quinqueremes | Hepteres | Squadron quality | Corvus | Cost |
| Publius Claudius Pulcher | Mediocre | Boarding Expert | 1 | Average | TRUE | 69 | |
| Gaius Lutatius Catulus | Mediocre | Boarding Expert | 7 | Average | TRUE | 335 | |
| Gaius Atilius Regulus | Mediocre | Dependable | 6 | Poor | TRUE | 145 | |
| Gnaeus Cornelius Scipio Asina | Mediocre | Dependable | 8 | Average | TRUE | 380 | |
| 929 |
| Squadron | Leader Quality | Personality | Triremes | Quinqueremes | Hepteres | Squadron quality | Cost |
| Bomilcar (CinC) | Exceptional | Dependable | 1 | Average | 104 | ||
| Hasdrubal the Bald | Capable | Boarding Expert | 6 | Average | 280 | ||
| Mago Barca | Capable | Dependable | 2 | 3 | Elite | 342 | |
| Hanno The Elder | Capable | Cautious | 6 | Average | 280 | ||
| 1006 |
I threw down a mat and some poorly made coastline, and we were off!
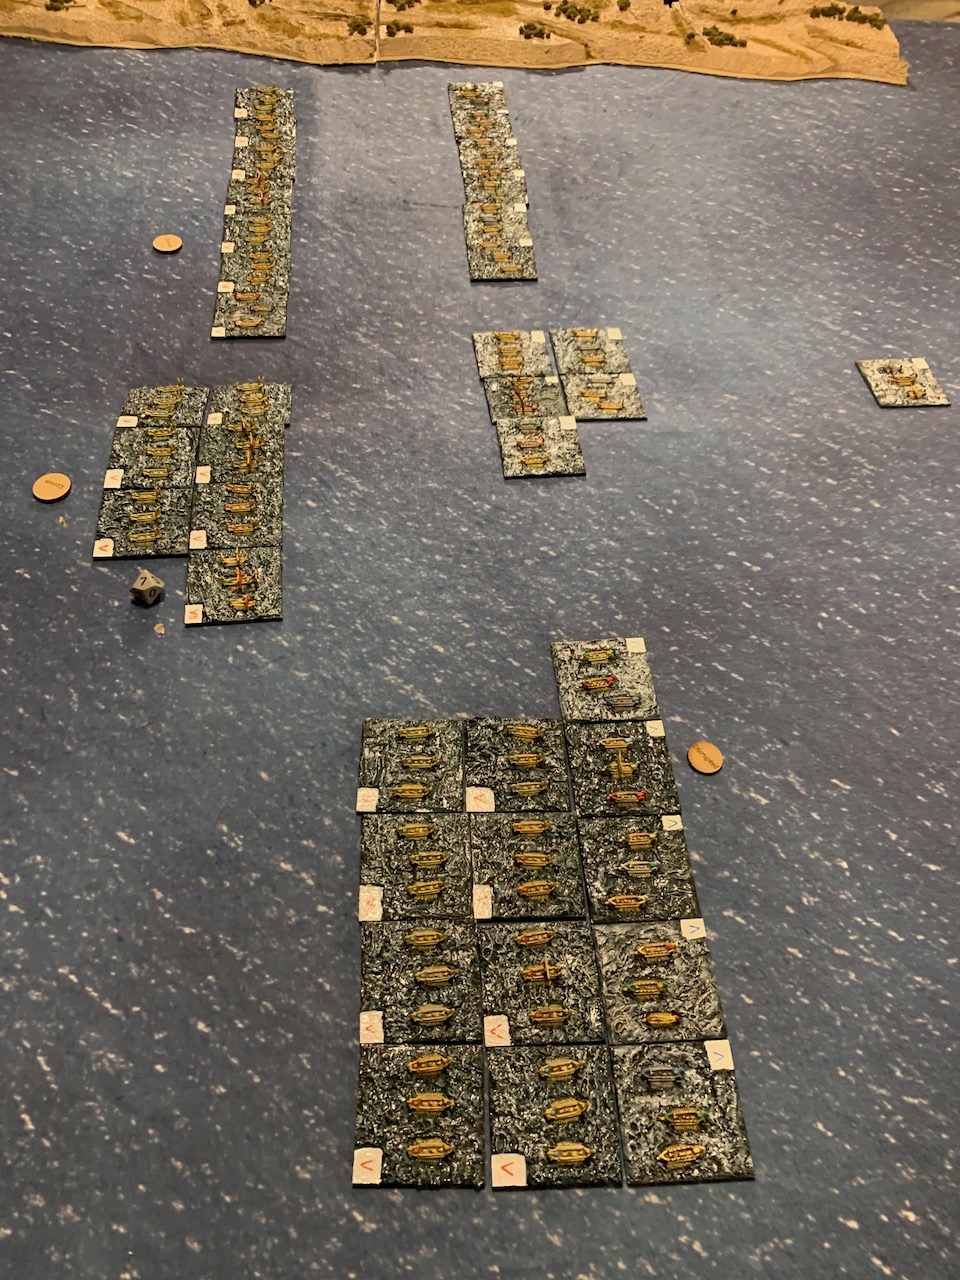
As neither of us were really sure how it would work, we adopted the standard ‘advance toward to bad guys to see how it works’ strategy. Despite being Cautious, poor Hanno got caught and beaten.
The next move the other two Roman squadrons were engaged; despite using their Corvae, they were thoroughly trounced. My opponent, the Carthaginian player, chose to move through and try and turn around. This was, on consideration, an error, as neither of his squadrons made their roll, and if he had stayed in contact the Romans would probably have disintegrated in the next turn. We only really discovered this later…
Hanno, poor chap, was only allowed to move a 1/4 move. It was not clear from the rules how far one could move backward on a 1/4 move; a normal ‘backing oars’ move is only 1MU. We arbitrarily decided that we would let him go back 1MU.
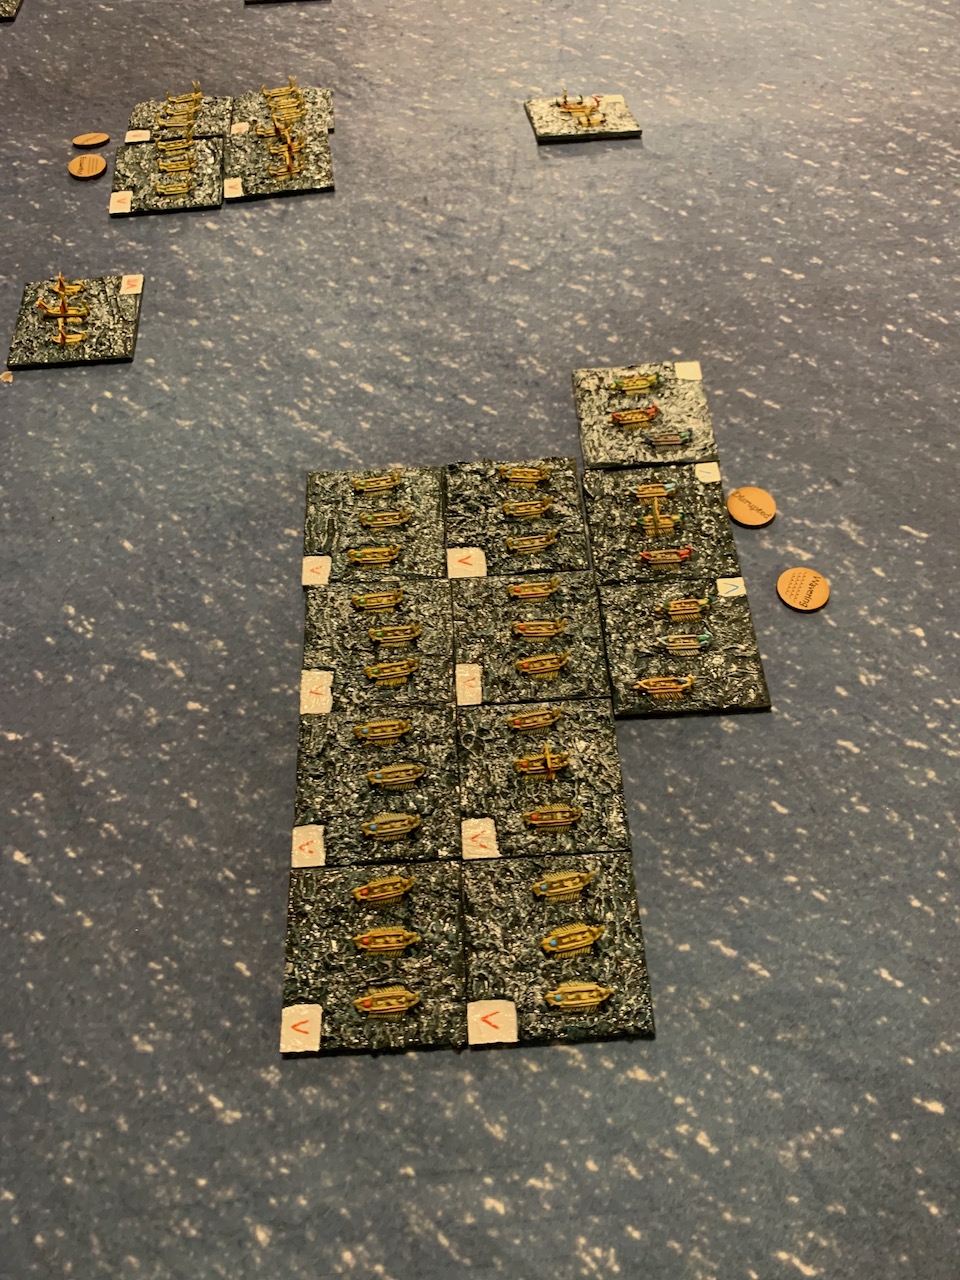
It didn’t help much, as the Romans pounded onwards, and his squadron broke.
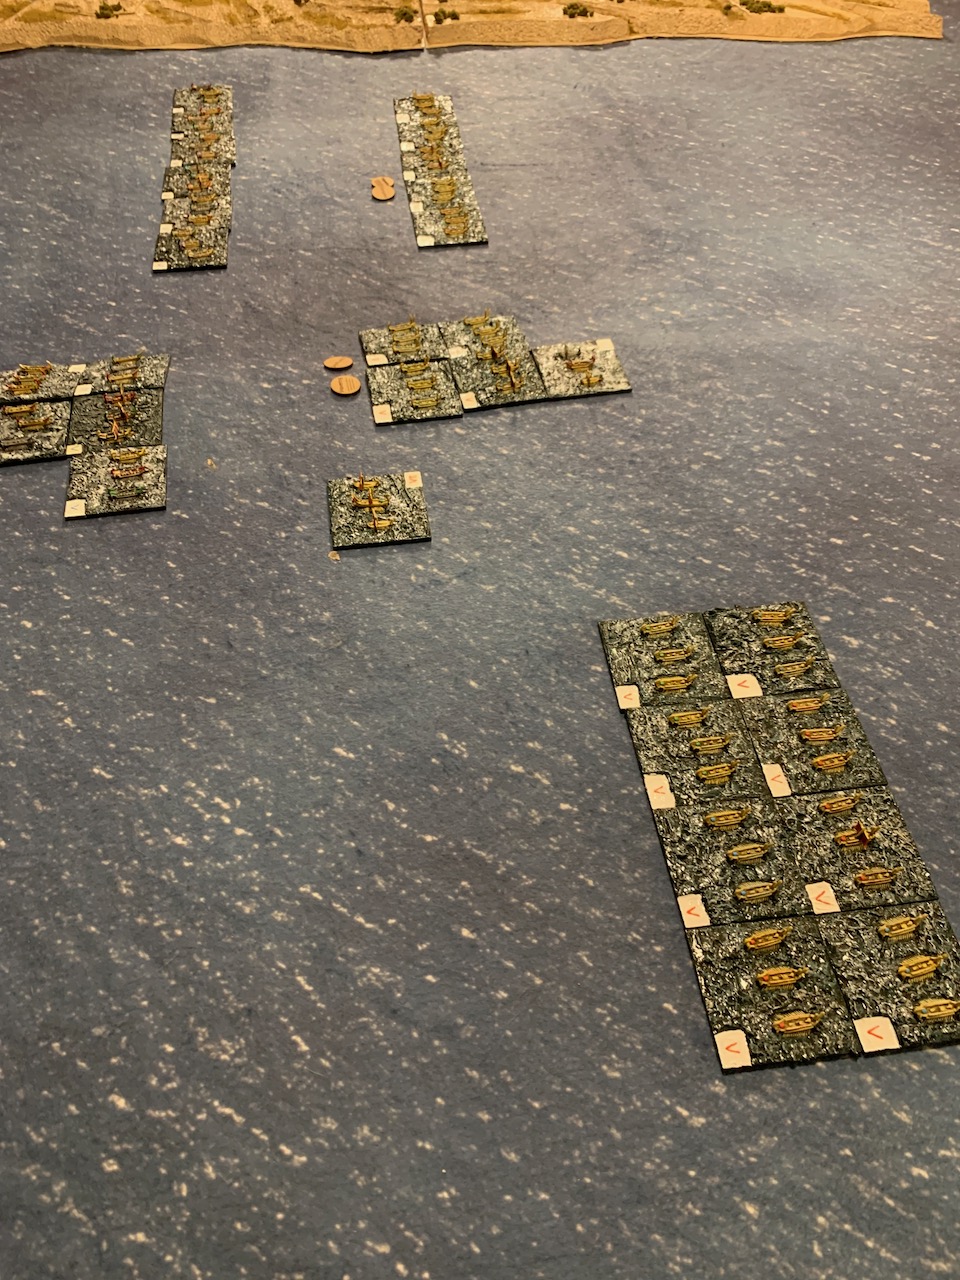
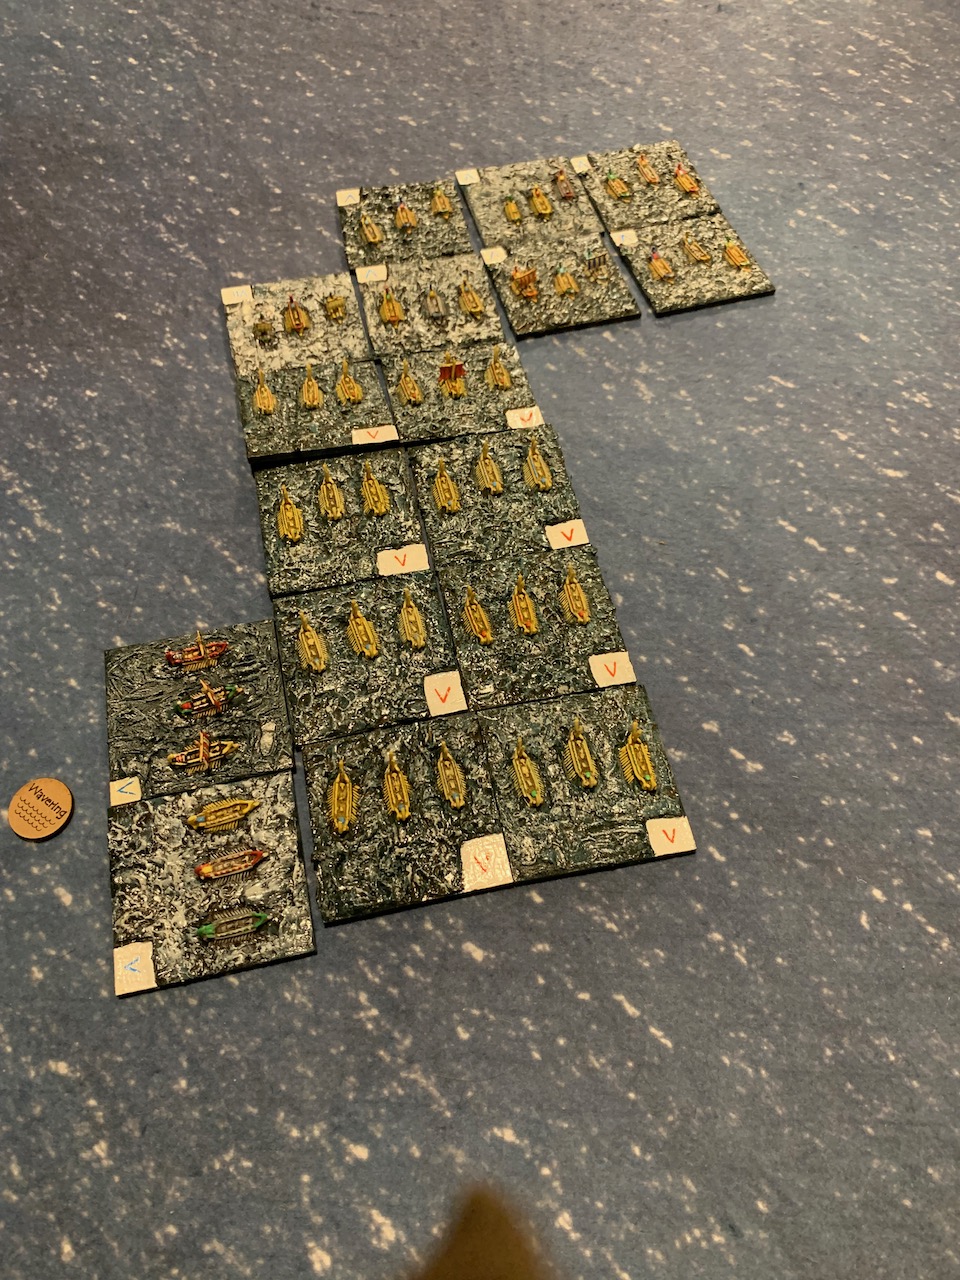
On the other half of the board, the Carthaginians were chasing the disorganized and despairing Romans
As expected the poor Roman squadron was obliterated. The other turned around, expecting no better result. Scipio formed double column to try and get into the fight
Somewhere around here questions about the Fleet admirals came up. They had ships, but were not assigned into a squadron. But the Rules say that squadrons of one are removed. We ignored this because Rules do not apply to admirals (clearly).
Both of them got sunk, anyway.
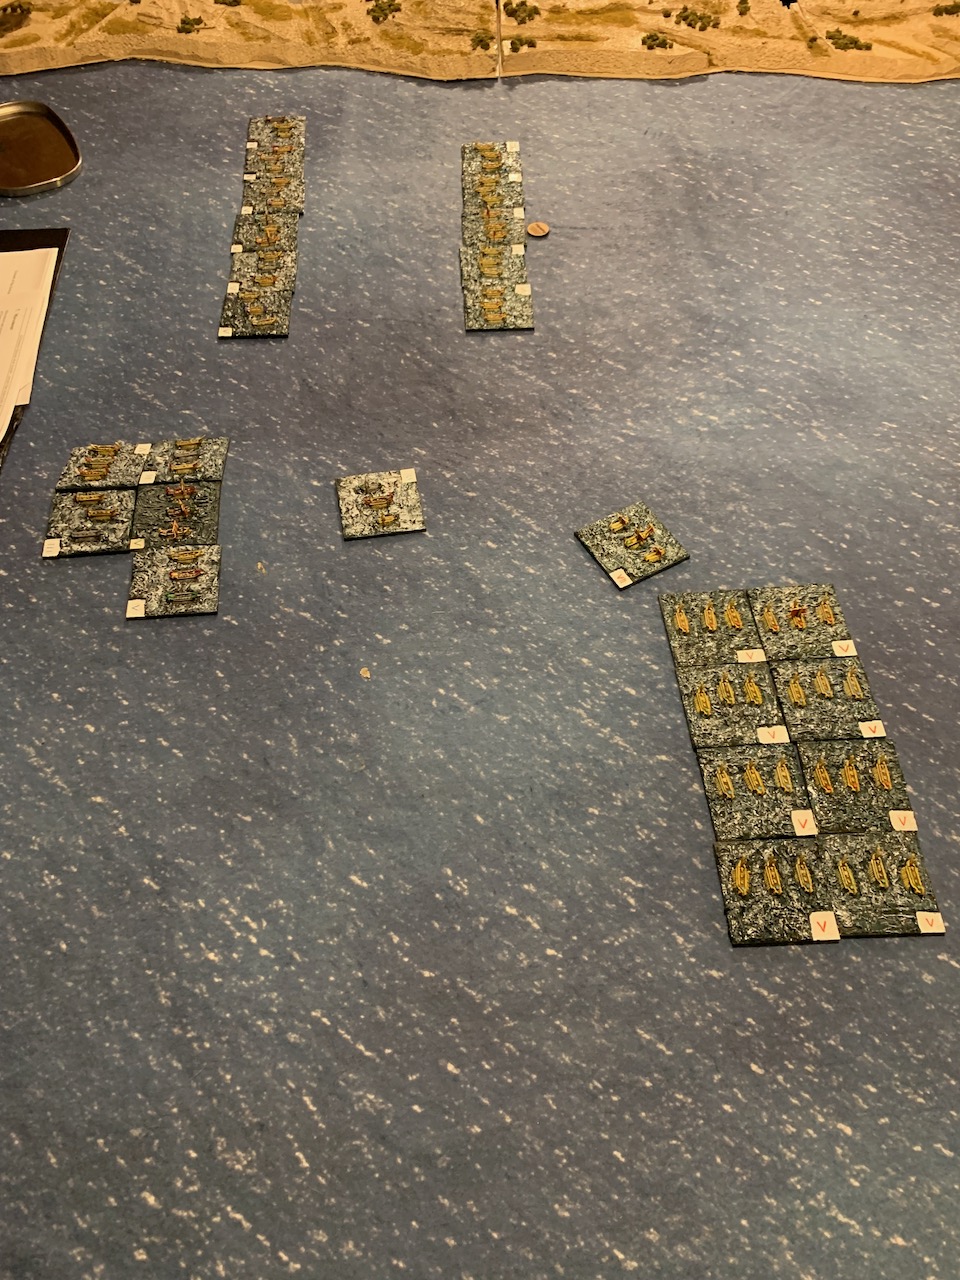
Another Rules thing ; Scipio was hit in the side. The rules only talk about being hit from behind, so we supposed everything turned (not really a good answer for the Carthos),
The Romans, despite the admiral doing a Jack Hawkins impression were not much worse off with him absent than him being mediocre. And I managed to roll high, and the Carthaginians did not…

Enjoyable and quick game, all in all. We will play again. And I’ll paint more boats.
The mediocrity of the Roman admirals is a severe drawback, but certainly made it interesting.
The battle of the Alma… Sort of
It has been a quiet year for gaming, unsurprisingly. In celebration of vaccinations and the ability to actually interact with other people, I put on the Alma scenario from Neil Thomas’s 19th century war-games rules. No optional rules were used. The game was enjoyed by all, though it turned out to be rather briefer than I expected.


The rules were as written, save that we were using 28mm figures, and so I changed the distances in the rules to be measured in inches, and the squares on the map given to be 24” each.


The battle was brief because the overly aggressive British poured across the river and up the slope, rather rapidly discovering that Cannister fire is a BAD THING (to quote messers. Sellars and Yateman). I must admit I feel slight guilt about this, because I prepared quick play sheets for those involved, and I am afraid I neglected to emphasize that the British infantry outranged the Russian by double, and that thy could engage the guns from outside close (canister) range, and that the Russian infantry were more or less constrained to melee. Closing allowed the Russians to respond with energy. Mea culpa, mea culpa, mea maxima culpa.


In any case the British crossed the stream without softening up the Russians at all, allowing both the russian infantry to charge home and the Russian guns to fire at close range. They were driven off the slope in a welter of fallen lead.


We called it on turn 7. Oh well, sorry lads.
Figures are a mix of Wargames Foundry and Great War Miniatures
We hope to try some more soon.
The not-terribly-glorious 1st of June
In what seems to have been an early iteration of Brexit, we staged a hypothetical naval battle set in the 1850s, using the Broadside and Ram rules. Originally this was intended to be an British vs French extravaganza, but shortage of equipment of the French side caused the inclusion of some Prussians and Austrians, turning it into a early Brexit conflagration.

The British Fleet
Vice Admiral Sir Charles ffoulkes-Heatherington
| Name | Type | Cruise | Max | Attack | Defense | Notes |
| Victoria | WS | 3 | 4 | 3 | 3 | SOL, Flag |
| Agamemmnon | WS | 3 | 4 | 3 | 3 | SOL |
| Hero | WS | 3 | 4 | 3 | 3 | SOL |
| Constance | WS | 3 | 4 | 3 | 2 | Steam Frigate |
| Mersey | WS | 3 | 4 | 3 | 2 | Steam Frigate |
| Phoebe | WS | 3 | 4 | 3 | 2 | Steam Frigate |
| Diadem | WS | 2 | 3 | 3 | 2 | Steam Frigate |
Rear Admiral The Hon. Algernon Gore-Booth
| Name | Type | Cruise | Max | Attack | Defense | Notes |
| Arrogant | WS | 2 | 3 | 3 | 3 | Corvette |
| Retribution | WS | 2 | 3 | 2 | 2 | Corvette |
| Basilisk | WS | 3 | 4 | 2 | 2 | Corvette |
| Hecate | WS | 2 | 3 | 1 | 2 | Sloop |
| Hasty | GB | 2 | 3 | 1 | 1 | Gunboat |
| Insolent | GB | 2 | 3 | 1 | 1 | Gunboat |
| City of Baltimore | SS | 3 | 4 | 0 | 2 | Armed Merchant |
The French (and Allied) Fleet
Contre-Amiral Auguste Fevrier-Despointes
| Name | Type | Cruise | Max | Attack | Defense | Notes |
| Louis XIV | WS | 2 | 3 | 3 | 3 | SOL |
| Ville De Paris | WS | 3 | 4 | 3 | 3 | SOL, Flag |
| Souveraine | WS | 3 | 4 | 3 | 3 | SOL |
| Impetueuse | WS | 3 | 4 | 3 | 2 | Steam Frigate |
| Souveraine | WS | 3 | 4 | 3 | 2 | Steam Frigate |
| Némésis | WS | 2 | 3 | 3 | 2 | Steam Frigate |
| Cormandel | SS | 4 | 6 | 0 | 1 | Dispatch Vessel |
Chef de division Marie-Joseph-Camille de Saint-Jean d’Angély
| Name | Type | Cruise | Max | Attack | Defense | Notes |
| Dupleix | WS | 3 | 5 | 2 | 2 | Corvette |
| Dandolo | WS | 2 | 3 | 2 | 2 | Corvette |
| Erzherzog Friedrich | WS | 2 | 3 | 2 | 2 | Corvette |
| Blitz | GB | 2 | 3 | 1 | 1 | Sloop |
| Cyclop | GB | 2 | 3 | 1 | 1 | Gunboat |
| Danzig | SS | 4 | 6 | 1 | 2 | Dispatch Vessel |
| Preussischer Adler | SS | 4 | 6 | 1 | 2 | Dispatch Vessel |
The fleets were composed, more or less, of the ships I had available, and the values worked out from the rules. In general, I used values for ships found in the data sections. While the smaller ships I’m fairly happy with I suspect the Ships of the Line should have higher offensive value, especially the 120-130 gun ships. For instance the Kaiser (91) in the data section of the Lissa scenario has an offensive value of 4, rather than 3. I decided to leave them all at 3 for a first outing, rather than wrestle with broadside throw weights. This would be because I am lazy.
The scenario is roughly this. The British squadron has been sent to intercept a vital French supply convoy, consisting of desperately needed ormolu clocks and rare columbian mustache wax. The French and their European allies will fight to retain these treasures, without which Parisian life would not be worth living.

The French won the scouting roll, as I seem to have given them too many plusses, but then I messed up the benefits for winning, so it worked out, really.

The two pairs of squadrons engaged their opposite numbers more or less in insolation, partially because Admiral Gore- Booth (i.e. me) lost the plot, and did not support his superior as he was told until too late.

The French heavy squadron approached the British head on, attempting to break through the line, clearly having read the Trafalgar post match review.British fire caused some damage, but was not effective enough.
The French broke the line, collisions being avoided (we decided if no damage took place, the ships would not stop their movement), and rapidly Shattered or Crippled enough British ships that the formation fell apart. This processes was enabled by poor births command and clearly substandard damage control training. In other words, ffoulkes-Heatherington showed a marked reluctance to roll greater than a 2 on either command or combat dice, resulting in the rapid destruction of his squadron.
The light squadrons engaged as well. The French detached two faster ships for an end run.

However the dices that had deserted the senior British admiral had scurried over to join the junior, and the French squadron found itself in difficulties.

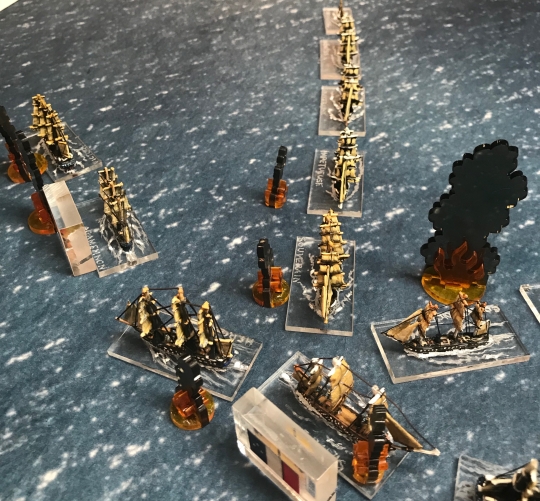
Things only got worse for the French, though they had some success, Saint-Jean d’Angély’s squadron was reduced to wrecks, though managing to set a fire on the British second in line with almost their final shots.

The sinking wrecks of the other British squadron can be seen in the background
At this stage ffoulkes-Heatherington ordered a general withdrawal, gently reminding Gore-Booth of his ignored orders (oops again) , and the match was called, with a French/Euro victory.
General Thoughts
The rules played well and smoothly, even allowing for the umpire messing things up (including forgetting that there was a fleet break rule in the game. Sigh). The rules were clear, and no trouble was had proceeding through turns very rapidly.
The only things I’d look at to change are increasing the gunnery values of some of the larger ships (though not necessarily the defense factors), and adding some more things to do with command points. Some of the David Manley’s other rules have a similar system, but some additional things to spend action points on, and I think I shall adopt them in here, if only to provide variety.
I suspect also that I will not allow ships not in formation to provide supporting fire. This may be in the rules, but I couldn’t find it…
All in all a fun time, and we shall have another go sometime.
Crimea!
I finally painted enough stuff to have a go at Neil Thomas’s 19th century rules. I’ve been looking forward to this for a while (what can I say, I’m a slow painter).
We used the scenario setup as in the rules, and ended up with the Pitched Battle scenario. The attacking French sent their 3 cavalry units on a flank march, and the Defending Russians (me) had a forward deployment, allowing the two cossack units to deploy well up the board. this proved to be a terrible mistake as the French shot them to pieces with their fancy rifled muskets.

As a side note, I have doubled the moves and ranges more or less, because I have based things on very large bases.
Hindered by their truly appalling command status, the Russians lumbered toward the French getting shot to pieces in the process. I was fairly sure it was a doomed outing, but the remnants of one infantry unit managed to stagger into the objective village on the left, and the grossly surprised 22nd Lancers managed to drive off a flank attack from the French hussars, then drive them from field, shortly afterward seeing the remnants of the Chasseurs d’Afrique off too. The Chasseurs had a previous close encounter with canister while charging a battery, and were regretting their enthusiasm by the time they met the lancers.
It was to be a flash in the pan, all the same. The flank marching French cavalry took the two batteries that had softened up the French in the objective village, though took severe casualties. The Russian remnants in the village were shot out of it, and the village reoccupied by the French.
The despairing Russian charges on the Russian right drove from the field two french units, but the scant remnants of the french musketry were insufficient to drive the French from either of their remaining objectives.
We called it at that stage, not wanting to continue farther. All in all we enjoyed the game, and are looking forward to having another go.
The Irish SAGA continues
Lest it be thought that I do not actually PLAY any games, I thought I should include something of a battle report. Not a terribly good one, I will add, but something to prove I do actually play a game every so often. Apologies for the quality of the photos, apparently focusing was hard that night.
We previously saw my SAGA Irish army (albeit a completely not dark ages one). In the interest of reminding ourselves how to play the game, I trotted it over to a friends house to have a game or two.

Irish hearth guard sneak around a wood
He came up with a Saxon horde; 3 or 4 units with 12 guys in them, a seeming sea of bad guys. I looked at this with some trepidation; I could not see how to defeat them. All the interesting terrain (a wood and some rocky ground) fell in the middle of the board, and only a gentle hill on my left.

Oh gosh, we’re stuffed, they are gonna slaughter us
I concentrated the fire of my guys on his unit behind the woods, even loosening the dogs on him (much too early in the game, they got clobbered) and working my hearth guard and the mounted Curaidh around the right side of the woods. Two other units made an attept to slow the sea of saxons coming over the gentle hill on my left. In this, they failed dismally, and it looked like they would have the floor wiped with them before my erosion of the right flank would show any profit.
Due to spectacularly bad die rolling on my opponents part, though, his attack did not come off, and the fall of the numer of units he had with more than 10 guys in them to a small number stymied his activities on his battle

How the heck that happen, we won
board.
My lot made it around the right hand side, polishing off his leftmost unit and starting to lean in lean in on his others. It came to an Irish win on points.
We had a quick go at another game, ( I wanted to try out the welsh) but rapidly found that they require terrain that does not grant cover to be effective at all, and we had left the woods and rocky ground down, so they were helpless against my opponents scots.
Only thoughts :- I have not played that many SAGA games, but it does seem to me that most of the armies I have played against specialize in producing single attacks with large numbers of dice. The Irish do not. They nibble away at their opposition, and there is a large group of activations on their battle board that lower their opponents dice, rather than raising their own capabilities. This means they shoot away at their opponents with javelins (a real problem for the Saxons, as they want units of over 10 guys, and the small incremental losses will mess them up) and that they are frustrating to fight as when you put together a “big attack” with your hearthgurd, you suddenly find that you do not have any dice. Also the single hearth guard figures that are self activating seem to cause irritation to ones opponents out of proportion to their usefulness. Not sure my reputation can withstand playing an army where the object is to annoy the other player… oh wait…..
Tussle at Grosser Stuhlgang
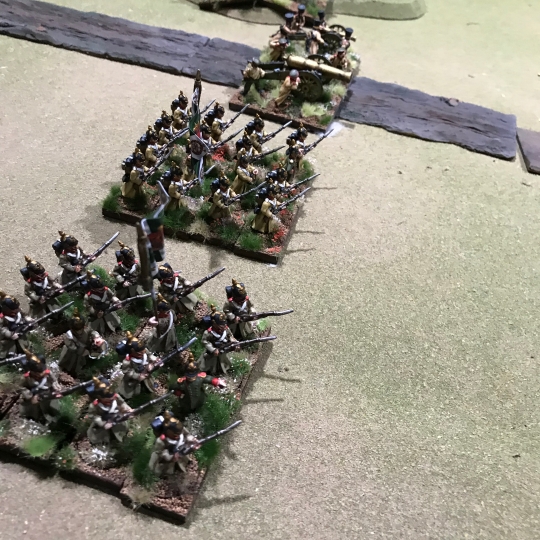
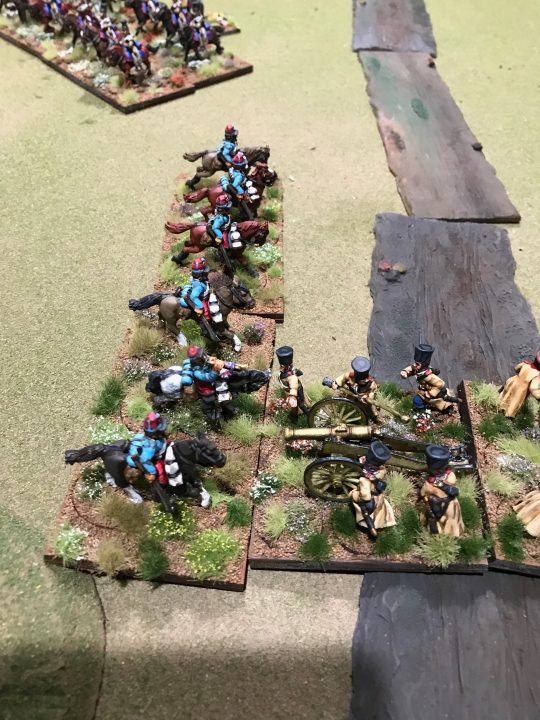
General der Cavalrie Ferencz looked glumly across the country at the village of Grosser Stuhlgang. It was teeming with Hanoverians, supported by cavalry and guns. The woods, orchards, plowed fields, and farm field walls near it just made it even more impractical to attack. Especially as while his cavalry arm was strong, his infantry was doubtful. Full of bohemians, he thought. There was no manner he could see to assault the place with cavalry, and he was instructed to take the place to secure the crossing over the Danube. The English had rested their right flank on the village. The plains contained the rest of the enemy; infantry with a smallish contingent of cavalry. He feared that the enemy infantry knew what it was about; it looked to be able to do things like march, and dress ranks. More than his crowd appeared to be capable of. Well then, it was to be won, it would have to be on his right. He would deploy his cavalry there, move forward, smash the enemy horse, and move on the flank of the infantry. His motley crew of foot would stay to the rear.
Ed and Mark had a game of Maurice last week; Ed ended up attacking with a cavalry force, using the “Maison De Roi” and “Great Captain” cards; Mark, with the English had the “Lethal Volleys” and “Steady Lads” cards. The English were deployed with one flank on a village and 3 cavalry minding the other side. The Austrians massed 5 units of cavalry and a hussar against the 3 English horse, and held their unimpressive infantry and guns in the middle.
The hussars leapt forward, crossing the field in best Hungarian fashion. In response to their appearance the English cavalry moved forward, prompting the Austrian regular cavalry to do the same.
Seeing his cavalry facing the horde of Austrian horse, Sir Bently ffolkes-Smith, the English commander, moved his infantry forward to engage the Austrian foot, and support his cavalry with the leftmost regiment (they were only Scots, it would not matter much if they were run over by the Austrian horse). Unfortunately the Hanoverian forces on his right did not get the memo about moving forward, so they stood and watched the others. ffolkes-Smith’s report on the action stated the message “went astray”. The memoirs of Graf Count von-und-zu Katzehaarekugel, however, state that the message was soaked into illegibility when the courier, Captain Rupert Fotheringay Upper-Class-Twit, on seeing some ducks in a farm pond in passing, promptly leaped from his horse and spent a quarter of an hour splashing around in the water, waving his elbows with his hands tucked in his armpits and saying “Quack, quack” at the top of voice. However it happened, the Hannoverians stayed put.

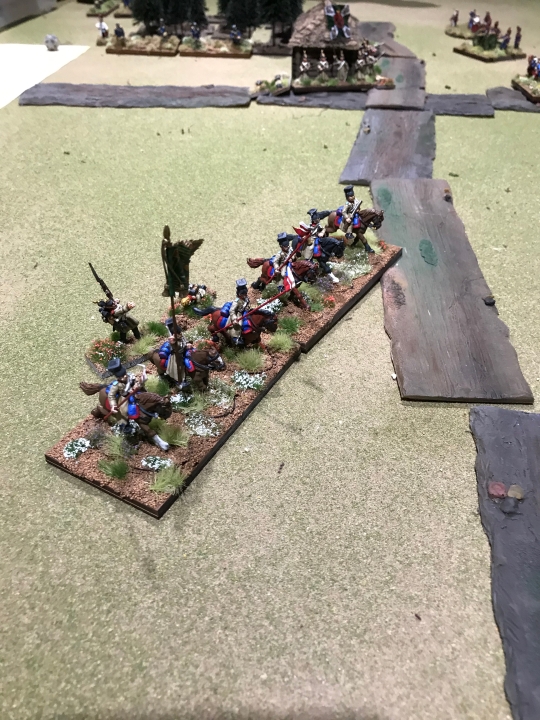
The Cavalry dukes it out
It now came down to seeing would the superior Austrian cavalry dispose of their opponents before the british infantry disposed of theirs. It certainly went the Austrian way. The English cavalry was swept away, even including an infantry regiment that had been sent in support. The only loss was the unfortunate cavalry regiment that found itself in front of the highlanders. On the flip side, the Austrian infantry, supported by their guns, proved surprisingly resilient, standing up under the lethal English volleys, and giving very much as good as they got. The Austrian horse rolled up the English flank, and their opponents went down to bitter defeat.

The Infantry firefight
The 2 main comments to be made here, is that we are getting better at this game, and that a spread out defensive deployment is counterproductive if your enemy does not oblige you by attacking a difficult objective; you really lose the use of the units.
On a side note to ffolkes-Smith: attacking when your job is to defend may result in unpredictable results….
Lions and Tigers and Shermans, oh my

Oh gosh, there is a lot of them
Despite appearances, I do actually play a game every so often. So when Mark decided he needed to try out his latest Late War Flames of War army, a horde of Russian Sherman 76mm tanks, I volunteered my services.
Then he told me I had to play something Axis, with panthers.
I do not own any Axis armies.
I do not usually play veteran troops (this may be why I do not usually win games). The only tank forces I am accustomed to playing are hordes of valiant communists who die in droves. I did not regard this as good practice for playing some form of Axis finesse army.
And, more or less, I was right.
Looking for something that fit his criteria, I came up with hungarian tanks from the same book he was taking his guys from. I ended up with :-
HQ- Hungarian hero guy (ain’t even trying to pronounce his name) in a Tiger
Plt 1 – 2 Tiger I
Plt 2 – 3 Panthers
Plt 3 – 2 Panthers
Plt 4 – 4 of some sort of hungarian recce tank, apparently armed with a ballon on a stick
It is possible that if I had actually owned the lead, I might have looked at the 12 vehicles (4 of them clown cars) and wondered if a better list might be constructed. On the other hand, I might not have noticed the possible issues. The problem was brought home to me when Mark showed up with my entire army in a tiny cardboard box and his requiring a tool box, and possibly a porter that he paid off at the front door.
Oh well.
Marks list was..
HQ – Sherman 76
Co 1 – About 275 Sherman 76s, led by some sort of proletarian superman
Co 2 – Only 150 Sherman 76s
Co 3 – 4 Su-100
Co 4 – 3 BA64
Honestly, I think the platoons were 8 and 6 Shermans respectively, but I am not terribly sure, There was certainly a lot of them.

HOW many tanks is that?
In the interest of playing something new, and noticing that “Dust up” was starting to show its face in tournaments, replacing “Encounter” and “Free for all” we decided to give it a go. And I must admit it was a pleasant change of pace.
It did mean that I started with 6 tanks on the board. Mark had 13.
I shall be honest. I did not have a clue what I was doing. I put my tigers where they could shoot; I relied on the hero guy making his stormtrooper roll.
Of course, he did not; having missed everything in my turn, the return fire killed my hero guy, and the enemy tanks closed in on my objective (and few tanks).
After the second turn, we called it, because I was going to lose. Completely due to my inability to run my army; always a reassuring feeling.

Urp. We're done here
Reinforcements had turned up, in the form of Dan, Allan, and Ed, so we went again. I decided to let Dan run my guys, as he runs german Panzers all the time, and we started a game of “Encounter”, something that at least I was comfortable with the dynamics of.
We started with the two panther platoons on this time, a better choice with all the AT12 guns facing us, the three vehicle one on our leftmost objective, and the two vehicle one on the rightmost objective.

Initial deployment
The Soviet opposition placed 4 SU-100 on our right, and 8 or 9 Sherman 76 on our left.
The game developed slowly, with the Shermans moving into a central position, being ineffectually sniped at by the 3 tank Panther platoon which was shuffling back and forth behind the housed of the central village.
On our right I pushed the two panthers toward the SU-100s, who were minding an objective behind a wood. My thought was that maybe I could use the reduced visibility of the wood to isolate one SU, and force the others to move to return fire, making myself hard to hit.
This plan was carried out. I managed to bail a SU (Yeah, fearless, that was gonna work) and then the Russian hero thundered over, unaffected by Hen and Chicks (old version) and got a side shot on a platoon commander, as well as a frontal shot from the SUs. of course he died, followed promptly by the other tank in the platoon.

I guess not doing that would be a better plan
Due to my brainwave, we were now more or less stumped. the tiger platoon came on, taking up position around out right objective, dissuading the SU100s from anything dramatic. Marks second platoon of Shermans came on, on his right, but fire from the panthers in the village and bad bogging rolls reduced them to one tank, making it difficult for them to do anything. I pushed the recce tanks up the stream to Marks left objective, but there was a stay behind sherman which prevented us from achieving anything much.

Canoeing in tanks
With the game basically bogged down, as it looked as if whichever side moved from cover was going to be destroyed, and 2.5 hours elapsed, we called it as a 1-2 losing draw.
I must say the Russian Sherman 76 was impressive, just hard to deal with all those reasonably powerful tanks. I wonder how it will fare in the upcoming book?
We wander north of the Border to Madison
The rather scruffy collection of Chicago war gamers noticed that there would be a tournament in Madison, WI at The Last Square. Liking both the gamers up there, and the store, we decided we would come back from our break in FoW-ing by heading up and having a good time. 1500 points, midwar, what fun. And then, in my case, we forgot all about it.
I had not played FoW for 6 months. Not painted anything in that long, either. I had no idea what on earth I was going to do. I did manage to get a couple of games in before departure, but they were both 1750 points late war. Oh well, I suppose they would help me remember the rules.
As for a list, I dipped into my stuff and produced :
 .
.
It does look marginally better in real life, than in my poor photo, and consisted of
HQ – T-34
Company – 10 x T-34 with Tankodesantniki
Company – 5 x T-60
Assault Gun Co – 4 x SU-122
Tank killer Co – 4 x SU-85
All Fearless Conscript
Local reaction to this was unmixed. While some were discreet enough to remain silent, the potential weakness of the t60 platoon was pointed out (“accident waiting for a place to happen”), the absence of recce, and the fact that the assault guns had no MGs all featured in the critiques I received.
Not that I didn’t believe them, but I had played 2 games in 6 months, had hardly set the world on fire before that and the chances of me painting something new in a couple of weeks was less than nil. So with it I was going. Besides, it was small and very little trouble to blow the dust off and pack. Here is the Battalion Co, doomed from the start.

It appeared that I was driving, so I scooped up Dan “Panzer Dan” and Simon “Hedgehog” at an ungodly hour on Saturday morning and headed north. Made all the more ungodly by me having to dump a child off for a school trip, requiring me to be up at 5. And then the dog wasn’t so terribly well during the night (I’ll spare you the details, but I hope the fertilizer quotient of dog droppings is fairly high, we can save on gardening stuff next year) so I was up at 4.
I drank a lot of coffee, but playing a tournament after 4 hours sleep when I was not entirely sure of the rules was not a prospect that filled me with the image of the glory I was going to gain. So I decided to sit back, relax, and get as many t34s blown up as humanly possible.
We actually arrived in good time, to find the store as nice as ever. If memory serves, there was 12 tables, 3 each of snow, City, Italy, and Desert. Joe “Keamma”, who was running the shindig, can correct me if I am wrong. Here is the place.

For my first sojourn I was drawn against a nice young bloke called Ben, who had German pioneers on a snow table in “Encounter”. The table was pretty broken up by belts of woods and a small village as well. The snow was slightly modified : everything was treated as having wide tracks, and if one did have wide tracks, one did not have to roll a test. Good news for the old t34s then, so off we went. Not so good for the pioneers who had brought their evil goliaths with them, as the entire board was bad going. I started the t34 platoon on, and the su122s, placing my objective against the back of the board. I cannot honestly remember where the rest of the objectives were, I decided to rumble across the board as fast as I could, before more of Ben’s stuff turned up. Ben took 2 pioneer platoons, and a couple of pak40s as his three platoons with endless goodies to appear later. And Stukas also, oh my. Here we are, trundling forward on turn two, I think

The Pak40s engaged the mass of tanks, killing one, I think. the su122s counter fired and killed them. The stukas caused much execution (3 tanks and an assault gun, maybe) on the approach march, making the route taken be littered by burnt out tanks and dead tankos. Ben had advanced both pioneer platoons into woods covering the objectives. Assaulting dug in pioneers with conscript t34s in woods, I could see this was going to go well. Then the marxist dialectic showed up big time (it could not be dumb luck, that would be a capitalist interpretation) , and not one, but both pioneer platoons looked blankly at their shovels, wondering what they were for as they failed to dig in. My tanks were close enough, so they rolled in, 5 of them with the battalion co. 39 machine gun/smg shots was enough to suppress the pioneers (they rather made up for the abject failure to dig in by their abject failure to fail many saves), and we rolled into the woods, also failing to bog any tanks. The pioneers were not hit very much, but immediately failed their tank terror and fell back into the snowy wastes on the other side of the wood near the objective. T34s rumbled to the edge of the wood, failing once more to bog anything (I guess I will take not bogging over not hitting anyone in melee). Next turn the pioneers fail to unpin and are left to burrow into the snow. The other pioneer platoon leaves its position,, but it is much too far away to get anywhere that matters. I am thinking, ok, I have a bunch of shots here, I can at least pin them, and fight without bogging rolls. I have 37 shots. Needing 6s. Marx smiles, and I hit 14 times. Bens “good save” mojo deserts him, the platoons fails a morale test, and My “shooting too successful” takes me onto the objective. Now all that matters is Bens re-enforcement roll, is something going to show up for him? Nope, he gets some, but they are over in the far corner. Game over, 6-1.
We were done fairly fast, so I had some to think about it while waiting for the next round. “Nothing special here”, I though “i had the advantage in Encounter, and had good luck, he had terrible luck” and came to the conclusion that I was still doomed. Dan

pictured here had managed to win his first game and avoid any sort of wardrobe malfunctions of the sort that has dogged him (or possibly the people looking at him) in previous events. Not sure right now how Simon did, but I am sure pretty well. The result of this was I ended up getting my second draw as fighting “Panzer Dan” with all his Afrika Korps tanks and some form of facist ubermensch guy in “No retreat” on a city table. With conscript tanks, and no recce. I could see that this was going to go well.
First roll was who was attacking, as we were both Tank companies. Fortunately, I won, because I would have been completely destroyed attacking. Ok, now I had to pick which 2 platoons to put on. The huge t34 platoon with the su85s in ambush seemed like a good choice. Or at least the best one available to me. I covered the front objective with the the t34 platoon, filling the buildings and ruins with smg-armed proletarians, and hiding the tanks as best I could behind the structures. I figured that to let him get shots without exposing a bunch of guys would just result in more burning hulks. This left me a bit off centre, and in fact the back objective was uncovered, but I figured that I would drop the su85s down there if (or when) it all went pear shaped. Dans panzers came on in a tight bunch on the other side of the boards, and his recce armored cars began to race ahead, followed by a clutch of sand colored panzers. And indeed, as he moved down, he sniped a couple of t34s he came into sight of, and then storm trooped out of sight again, driving happily through buildings. It appears that the german ubermensch hero allowed storm trooping on a die roll of -2. And his armored cars were rapidly making it so there was no place on my side of the board (or so it seemed) I could place my assault guns. It looked depressingly like I was going to have to plonk them down now, without any decent shots. Oh well.
Then Dans armored cars failed their stormtrooper roll, leaving one perched in the middle of the main Kiev – Smolensk toll road, and the other only half behind a building. I had 2 t34s that could shoot, one at long range in the open, and one at short. OK, I would stay hunkered down and hope I hit him and he failed his re-org roll or something. Or decided to disengage from my firing.
So I shot. He did not disengage, of course, having a better grasp of basic probability than I. However, he had not been indoctrinated properly in the Marxist dialectic, and the tanker that needed a 5 to hit generated 2 hits and the one that needed a 6 one.
Armored cars hit by 76mm shells do not generally fare well, no matter how many wheels they have, so we were treated to the Hollywood meme of the burning wheel rolling across the landscape in both cases.
So things were looking up. As opposed to the rear objective being in immediate danger, now I just had to contend to with 4 MkIVs and 7 or 8 MkIIIs that were shooting holes in the t34 platoon. I had lost at least 4 by the end of Dans next turn, and things were not looking good for the rest as the panzers storm trooped to reduce my shots on them. On the plus side he did not push any more toward the rear objective.
I decided I needed to drop the su85s out on the table, managing to get 3 where they could get decent shots at panzers, with the company commander stuck in cover minding the objective. And then I managed to roll a 5, and the su122s rolled on the back of the board, with a few more shots. The shooting was appallingly successful, with 4 MkIVs getting destroyed (including the facist ubermensch, after some consultation of the rules) and at couple (I think) of MkIIIs. here are the results of hot dice rolling.

(as you can see at the bottom of the picture, they gave us cookies)
The next turn Dan kept at it, baling most of the remaining t34s with his MkIIIs and killing off an su122. He then storm trooped out of sight, making me move to get shots.
In my turn, the t60s came on, took a brief look, and left. I moved the assault guns, remounted my tanks, and kept shooting. Though Dan kept eroding the t34 platoon, after a couple of turns I managed to force a check on his 4 tank MkIII platoon, which he failed, and I won because his company CO was dead.
This surprised the heck out of me, because now had 12 points, and I had really confidently expected to have 2 or maybe 3 by this stage.
In the last game I was going to be playing Simon and his pioneers (more bloody pioneers) complete with a Tiger AND a KV1e AND some marders. The scenario was either going to be “Fighting Withdrawal” or “Free-for-all” depending on a die roll. I was not enthused about attacking Tigers and flame throwing pioneers in “Fighting withdrawal”, so I was pleased when the NKVD had a quiet word with Joe (keamma) the tournament organizer (who did a wonderful job, great time was had by all, the check is in the mail) and it turned out to be “Free-for-all” on an italian table, woods, vineyards, a big village in the middle, and lots of contour lines.
I was tired by this stage, and my deployment and planning was.. limited. I decided to deploy the t34s and the su85s in the middle, so the ’85s could go either way to engage Tigers or KV1s, put the t60s in a wood near the right objective, and leave the su122s in the middle, with nothing near the left objective.

In so far as there was a plan, it was to push the t34s into the village in the middle, and hope that Simon (hedgehog) would not dig the pioneers in on his right, and rush them, and maybe some tanks, to the objective on the left. That would leave them in the open, where maybe I could clobber them, or get behind them to sit on his rightmost objective with the t34s.
And indeed, his left platoon, and the marders headed forward. But the marders headed back, and the t34s were getting shot up by the tiger, and the marauders doing the shuffle. On my right, the KV began to head toward the t60s, while the tigers was not obliging me by allowing the su85s to shoot it. I messed up here. I stopped the t34s and should have kept moving and tried to catch the pioneers in the open. Instead I got myself involved in a shootout with the marders and the tiger, and though I managed to kill 2 of the marders and they had to make a couple of tests nothing came of it. Except a mostly dead t34 company.
Now I had a bunch of burning hulks in the middle of the board, the su85s had to go to the right objective to help the cowering t60s against the oncoming KV, and at my left objective I had some assault guns without machine guns facing a platoon of pioneers with flame throwers.
This WAS working out well.
The KV finally rolled into the woods took a shot at the t60s, and missed. The german pioneers on my right hopped out their tenches (apparently these ones could find their shovels) on their side of the board and moved forward, flame throwers and all. The su85s were approaching shooting range of the KV, though, and the t60s managed to exit the wood without bogging anyone so all was not quite lost there. And the KV bogged itself, relieving the pressure somewhat. As opposed to the middle, where 2 marders, a smoke template, and a RoF 3 tiger were finishing off the t34 platoon. Or my left, where a su122 platoon had stuck one unfortunate of their number within 4 inches of the objective, and were waiting for the pioneer flame thrower assault. Which of course came, and, interestingly, mostly missed, or I saved the hits. In return, I missed. (love those conscripts). Simon blew up an su122 in the next round of assault. But I actually managed to kill a guy, and the pioneers failed tank terror and fell back.
The su85s, now completely intermingled with the t60s to dissuade the oncoming pioneers, conclusively failed to hit the bogged KV. For at least 2 turns, though I think we forgot it was trained. My battalion CO sprinted across the back of the board, passing the one remaining baled out t34, which lived merely because no german could see it currently. He managed to reach (just) the su122 platoon. Just in time, in the axis turn, for another assault. this time they flamed as they came in, and destroyed the su122 they baled, before failing tank terror again and falling back. This whole time, despite more or less constant shooting, I’m pretty sure they had not taken terrible casualties. The TO was now telling us to finish off, and we were looking a 1-1 draw in the face. So I took my last turn. Marxist-Leninist gun laying finally reached the su85 platoon, replacing the previous Trotskyist version, and they managed to perforate the KV-1, killing it. I assaulted the pioneers, managing to miss once more, but they failed tank terror and one died due to inability to get away from the tanks. They then took a morale roll (Simon pointed out later on that they shouldn’t have, he counted his flamer as dead when he should have been “absent” but oh well) and they went home too. Simon made a gallant attempt to kill off the t34 platoon, blowing up the last tank and then driving his tiger into a building to assault the last remaining tanko, but he missed and the tanko scurried off to safety, passing his morale roll.
And the game ended for time.
I had managed to lose 19 of 20 elements in one platoon, my plan had completely failed, I had assault guns playing games of chicken with flamethrower pioneers, but had made a 3-1 draw. There is something extremely Soviet about this….
It ended up that I had top score with Seans beautiful Alpini (winners by streets of the best painted prize). We decided to split the prize, but for some reason i was too tired to understand we still had to roll for honors, so I ended up as “Best General” (quietly snorts in derision before anyone else can do it).
So yes, there you go. A MW FoW tournament topped by conscript soviet tanks and Alpini from East Front. I’m sure Sean deserved the honor….
Russian assault gun Battle report #3
So, a bunch of us took some time off from Flames of war, indeed, from gaming altogether. However, the lure of the lead (or resin) has taken us back over, and now we jump once more into the murky (to me, anyway) waters of FoW.
Mark drifted over to my slobby basement to try out his Guards Armoured regiment from Hells Highway. his list looked something like :
HQ 2 Shermans
Troop 2 Shermans, 2 Fireflies
Troop 2 Shermans, 2 Fireflies
Troop 2 Shermans, 2 Fireflies
Recce 3 carriers
Artillery 2 25 pdr, Observer tank
infantry tiny pioneer platoon
AOP
Michael Caine … er Joe Vandeleur.
I had
HQ IS2
Platoon V.I. Rat, 5 ISU122, 5 Tankos
Platoon 4 ISU122, 4 Tankos
Recce 9 Rifle/MG
A/T 2 Zis-3, with halftracks
I set up a fairly busy table; and we ended up playing breakthrough, with me attacking. This left poor Mark with just one troop of Shermans on the table, his artillery, and the pioneers. Rather him than me, I suppose. I massed all the assault guns together, and planned to drive to the objectives and sit on them. I sent the AT guns as the flank march. Marks deployment had allowed me full use of my quarter of the board. Mark placed his tanks and guns in the upper left quarter.
Then, it was my go, and I immediately forgot how to play this game. Instead of keeping my stuff together, in a bunch, I separated the two platoons to go around the central village. This was, of course, stupid. I need all my stuff together, separate them and they will get destroyed piecemeal.
Mark got a troop of tanks in on the first turn, and showed that he was equally out of practice by shoving them over the other side of the board from the guys he had on the table. Here is a photo of the confrontation. I took a number of photos, but they were all dismal failures, this is the only one that came out.

The 4 Sherman could not really take on 5 assault guns frontally, and ended up falling back. I, of course, to prove stupidity is forever, chased them, leaving my other, smaller platoon fighting the rest of Marks army over the objectives.
This more or less came out as one might expect. The assault guns in the small platoon were smoked and destroyed slowly, as was the company CO., before the larger platoon could help. The AT guns came on as reinforcements, and surprising lasted a turn or two, killing a Firefly, before they died.
I bogged a bunch of the assault guns in the large platoon, making the relief even later, and of course they arrived separately in ones and twos, and were picked off that way.
Though we had a good time, I’m going to use this game as a clear example of what I should not do….
